28. Rocky Mountain Creators
A review of three inexpensive 1/4" (6mm) thick jigsaw puzzles made by a small Canadian company that shows considerable technical improvement in 2023 (about 6000 words; 50 photos)
[Note: Other than as a customer, and having received a free puzzle to assist in writing this review, I have no affiliation with Rocky Mountain Creators or its proprietors.]
Introduction and a digression
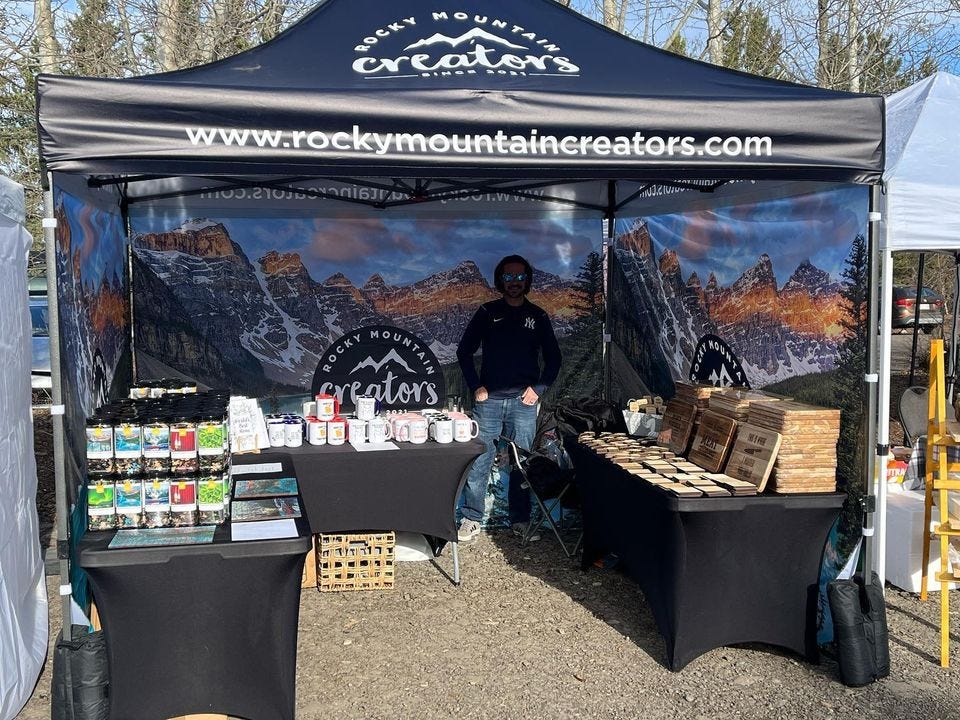
I first learned about Rocky Mountain Creators last year from a post by Karen Rivest in the Canadian Wooden Jigsaw Puzzle Group (on Facebook.) She had come across this new company at a pre-Christmas market in Calgary, Alberta. Karen said that she had enjoyed putting together one of their puzzles. Based on that recommendation I bought two puzzles which represented both of the only two cutting designs they had available.
Every other wooden jigsaw puzzle company that I know of, large and small, specializes in making just puzzles. Rocky Mountain Creators on the other hand mainly makes other types of craft items. Their puzzles, like their other products, are mainly sold at craft markets and tourist venues although the puzzles are also available from their website.
At the time, the biggest appeals of Rocky Mountain Creators’ puzzles to me were their low price and the fact that they are 1/4” (6mm) thick. Most relatively inexpensive wood puzzles are only 3 or 4 mm thick. Those can be very well designed and made, and give an enjoyable assembly experience, but they cannot deliver the same feeling of luxury as quarter-inch puzzles which give a very rich tactile sensation when they are assembled. That is also the thickness of puzzles from jigsaws’ first “golden age” of popularity in the 1910s. In my mind such puzzles best embody the heritage of our hobby.
[Digression: Jigsaw puzzles were originally made only for the very rich (or more accurately for the education of their children) and were made from thin planks of solid fine-grained hardwood. Puzzles for adults began to be made in the late 19th century and at first they were still only affordable by the very rich. Shortly after the turn of the 20th century companies like Raphael Tuck in England and Parker Brothers in the US began to mass produce such puzzles in factories, thus bringing down their cost. They were still hand-cut from solid hardwood, and fairly expensive, but moderately well-to-do people could begin to afford them.
That kicked off a short-lived craze among the middle class, who could now enjoy a luxurious pastime that had previously only been enjoyed by the wealthy. More companies began making picture puzzles (the name “jigsaw puzzle” was not yet standardized) and they started making other innovations. One of these was to use less expensive plywood rather than hardwood planks.
In the 1930s, during the Great Depression, there was another jigsaw puzzle craze. I have written about that previously, including here and here. It brought the price of them down even further to within nearly everyone’s reach, partly by using efficient cutting styles but also by using thinner plywood than the 1/4” that had previously been standard.
Jumping ahead to the 21st century, along with the innovation of laser cutting many puzzle-makers have switched from plywood to medium-density fibreboard (MDF) as their wood material. MDF is an engineered wood product made by breaking down hardwood or softwood scraps into wood fibres, combining them with wax and resin binder, and forming it into flat sheets by applying high temperature and pressure. It comes in various levels of quality but is generally denser (i.e. heavier), more water-resistant, and less expensive than hardwood plywood.
Some jigsaw puzzle enthusiasts think of plywood as the proper, authentic heritage material for jigsaw puzzles since it is associated with the still-abundant vintage puzzles from the 1930s, and it is the material that is almost always used for hand-cut ones. But MDF has a very practical advantage for laser cutting since it is of uniform density, unlike plywood in which can have knots or voids in the inner layers. Personally, even though I tend to be a traditionalist I don’t have any such prejudice against MDF. In some ways, especially its higher density, it is a throwback to the era of hardwood plank jigsaw puzzles. End of digression.]
Rocky Mountain Creators’ quarter-inch 270 and 277 piece puzzles cost $50 CDN ($37 USD). That is quite inexpensive as 1/4” wood puzzles go. Quarter-inch puzzles that have an equivalent number of pieces from other Canadian laser puzzle-makers (Stumpcraft, Puzzle Lab and Palmaris Puzzles) cost a bit over $100 CDN.
The high price of premium-quality wood puzzles is primarily due to the fact that making them is labour-intensive. Secondary factors are that their high price demands extra quality-control measures if the puzzle-maker’s reputation for a premium product is to be maintained, and their makers tend to give them extravagant packaging to underline their “heirloom quality.” Like many puzzlers I cannot afford to buy as many such puzzles as I would like. I therefore tend to alternate such puzzles with less expensive ones that I hope will give a satisfactory level of enjoyment in their assembly. That is why I search for what I call “frugal alternatives.”
My intention in this essay is to introduce readers to this rather obscure (unless one goes to Calgary craft markets) company and give readers enough information to determine whether their puzzles would be appropriate for them. But before giving you my review of Rocky Mountain Creators’ puzzles, and then walk-throughs of my assembly experiences that informed it, I will tell you a bit more about the company:
Rocky Mountain Creators
Rob and Tyler Steed moved to Alberta from Nova Scotia 25 years ago. Rob’s day-job is as an executive at WCD, a Calgary-based digital information and printing company. They began Rocky Mountain Creators in 2021 as a pandemic-inspired initiative to give their then-16 year-old son Charlie both an outlet for his creativity and a way to finance his post-secondary education (which, as it turns out two years later is training and apprenticeship in welding.)
As I understand it, Charlie is primarily responsible for fabrication of their products but they all take part in other aspects of their family business including putting in long stints manning their sales booths at seasonal craft shows and at tourist-draw venues.
Wooden jigsaw puzzles account for only about 30% of their company’s sales, but even so they sold about 2500 of them in their first two years of operation. Other products include wall art, charcuterie & cutting boards, and various other souvenir and gift items. 85% of their sales are made from their craft stalls or grow from face-to-face engagement at such venues. Thus, online puzzle sales is only a small part of their business. This is very different from other jigsaw puzzle-makers.
Besides their low prices Rocky Mountain Creators distinguishes their home-crafted puzzles from the much-more-famous Calgary-based wooden jigsaw puzzle-maker Stumpcraft (arguably the world’s best maker of premium laser-cut jigsaw puzzles) in other ways. The most important distinction is that no one in the family is a puzzle designer. Their current cutting patterns were developed by unnamed contracted graphic designers. To date Rocky Mountain Creators only has two cutting designs, although as discussed below those two are very different from each other, and they have two more patterns that will be released this summer.
Also unlike Stumpcraft, all of the puzzles they have sold to date have been photographic ones, using licensed pictures from professional photographers, and because they have more images than cutting designs the cutting patterns need to be re-used. On their website they tell which design goes with each image.
While I haven’t asked Rob for sales figures it is clear that their business is continuing to expand, and in ways that affect their puzzles. This year they have acquired a UV printer that is capable of making the images directly onto the wood substrate, and they are considering getting a second laser-cutter in order to increase production. Last year, Rocky Mountain Creators’ most prestigious marketplace was craft fairs at the renowned Spruce Meadows Equestrian Centre. This year they have been accepted to exhibit at the highly-juried Maker Market at the Calgary Stampede!
I suspect that almost all of Stumpcraft’s high-end puzzles are sold to people who are already big fans of wooden jigsaw puzzles – people who carefully shop and compare before making their purchase. But Rocky Mountain Creators’ in-person style of marketing reaches an entirely different kind of customer base than Stumpcraft’s. While the occasional wood puzzle fan like Karen Rivest might find them, most of the folks who come to their booth probably have never assembled, or even heard about, this kind of puzzle before.
I suspect that the family’s biggest challenge is explaining to cardboard puzzle fans who are used to assembling 1000 piece ones that a 270 piece wood one would be a challenge for them, and persuading them to spend twice as much money as they usually pay for puzzles to buy one. Many of their potential customers may not even already be cardboard jigsaw puzzle fans. If they buy it is probably a spur-of-the-moment impulse decision. Next, let’s see if their products are likely to win such people over to the world of wooden puzzles:
The Review
In November 2022 when I bought my Rocky Mountain Creators puzzles I chose Cabin in the Woods and Lobster Traps as representatives of their two cutting designs. During assembly of those puzzles I found that they had significant technical shortcomings that detracted from my enjoyment of assembling them, but that they had two very creative, attractive and challenging cutting designs. My conclusion was that I would be willing to buy more puzzles from this company when they came out with new cutting designs if they were matched with images that appealed to me. The low price and the creativity and quality of the cutting designs outweighed the technical flaws. In other words, these were satisfactory “frugal alternatives” to complement the higher-priced premium wood puzzles that I love.
After assembling them as I was researching for this newsletter I was able to talk with Rob Steed by phone. I was told that their production methods have improved since I bought my puzzles last year and they have now resolved the shortcomings that I had identified in the earlier puzzles. Rob graciously offered to send me a prototype of a yet-to-be-released new puzzle called Shop Local that reflects the current quality of their production for all of their puzzles.
After assembling it I found that they had indeed alleviated my most important reservations about their puzzles. My new “bottom line” conclusion is that besides being inexpensive Rocky Mountain Puzzles are now well-made puzzles that have creative cutting designs.
Both of the puzzle designs offer their challenges, but I think that the one that includes whimsies is more at the “fun” end of the assembly spectrum than the “challenging” end. It is suitable for both experienced and inexperienced wood puzzlers and I presume that those are the ones that the family steers newbies to as part of their face-to-face salesmanship. The other cutting pattern that does not include figural pieces is more suitable for experienced puzzlers who are looking for an intriguing challenge, and for reasons explained below I highly recommend it for such people.
The puzzles are packaged in plastic wide-mouth litre or quart canning jars. I applaud the company for this very creative protective, compact and frugal packaging. My only concern is that I read a warning from a museum conservator in an online discussion that people shouldn’t store their puzzles for extended periods in zip-lock plastic bags because humidity can become trapped and lead to degradation over time. I suppose that would also apply to sealed plastic jars. That potential risk is easily resolved. I have put those little silica gel desiccant packets that come with vitamins and other products into each of my jars. (Note: the little packets found in food packages are often oxygen removers not desiccants. Those do not remove humidity.)
Even before opening the jars I could see through the clear plastic that the pieces were made from 1/4” thick MDF which makes them among the thickest laser-cut puzzles available. That is a big positive. As discussed above, thick pieces give a very rich tactile experience and that thickness is usually only found in premium-quality puzzles. Unfortunately, looking through the plastic the image side of the puzzles looked rather dark and drab. That impression did not change when I assembled the puzzles. More about that later.
As I expected, when I opened the plastic jar I was met with a strong campfire fragrance. I suppose that the jars trap the fragrance even better than cardboard boxes. But it was a clean, pure campfire smell with no tinge of the odour of industrial solvents that has accompanied the smoky aroma with some puzzles when I first opened them. When I poured the pieces out they were not accompanied by any chips or dust. That is another good sign.
The images available to date on all of the Rocky Mountain Creator puzzles are photographs. Sometimes the names of the photographers are identified and sometimes not. Rob Steed assured me that they are all properly licensed. In the case of Cabin in the Woods I was able to find the original photo by Zachary Kyra-Derksen online from one of his websites (as well as statement that he was putting it into the public domain.) But seeing a hi-res version of the original photo confirmed something I had suspected. As you can see in the following comparisons, both the colour-match and the sharpness of the image on the puzzle really weren’t up to par.
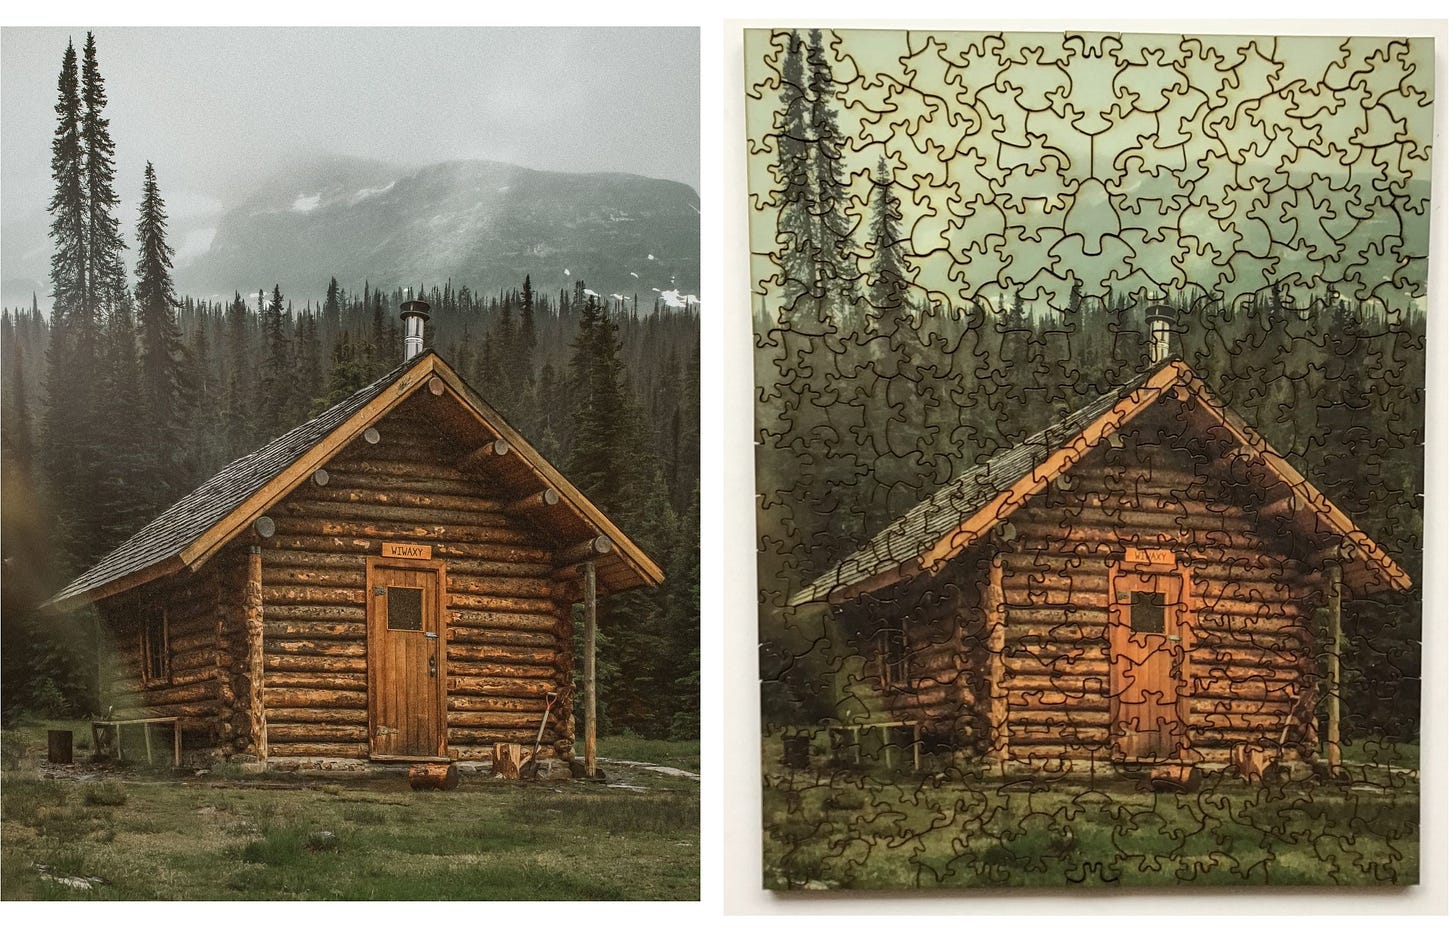

As you can also see from these comparison the colouration and sharpness problem was somewhat overshadowed by another technical issue. The cut-lines of these puzzles are very dark – darker than usual for a laser-cut puzzle – and they overwhelmed my appreciation of the image of the completed puzzles. There was also severe smudging on the front of the puzzle near the cut lines.
I have discussed smudging in previous reviews (here and here, for example.) Briefly, laser-cutting machines need careful calibration and the speed of their cutting needs to be adjusted to the density of whatever material is being cut. In the case of wood puzzles, they also need stronger-than-standard exhaust fans to be installed to remove the smoke before it can condense on the puzzle. Smudging is condensed smoke and it is a fairly common in puzzles made by relatively inexperienced puzzle-makers who are not yet familiar with how to get optimal performance from their equipment.
The smudging on these puzzles (especially on Cabin in the Woods) was the worst I have ever seen. In some places it is shiny black, and it could not be cleaned off with rubbing alcohol. I suspect that the problem was because of the dye sublimation printing process that Rocky Mountain Creators were using at that time. I wasn’t familiar with that kind of printing so I did a bit of research about it. Dye sublimation cannot be printed onto wood or regular paper; it requires a plastic transfer sheet instead. So the smoke from laser cutting included some plastic from the transfer sheet, which would explain its added stickiness and the fact that it could not be cleaned off.
Here is where the technical improvements that Rocky Mountain Puzzles has made over the past winter come in. They still use the same industrial-grade laser cutter but they have learned how to use it more effectively. I didn’t follow-up with Rob about this but I suspect that they have also installed a more powerful exhaust system on their machine. They also no longer use dye sublimation printing for their puzzles. They have gotten a new UV printer that can print directly onto the wood or MDF, or more accurately, onto a white primer layer that they print onto the wood first.
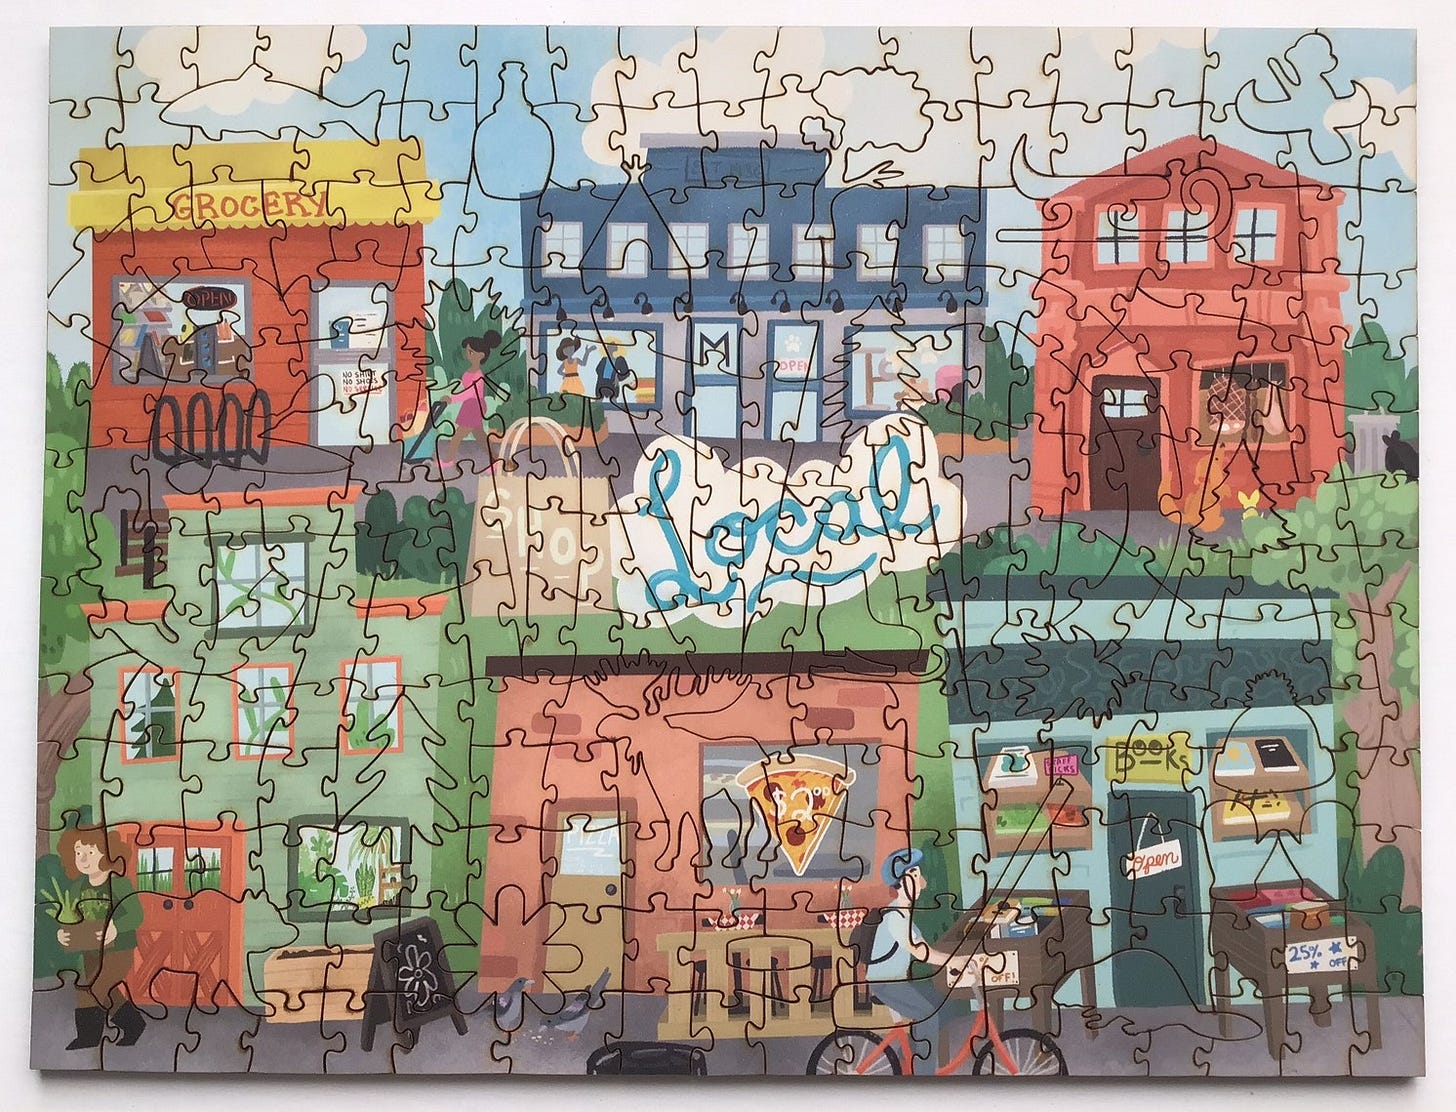
To illustrate the magnitude of the impact that these two measures have made on the quality of their puzzles Rob sent me a sample of their 2023 state-of-the-art. It is a preview of a puzzle called Shop Local that will be released in July at the Calgary Stampede. Robert tells me that this is the quality of printing that now appears in all of their puzzles.
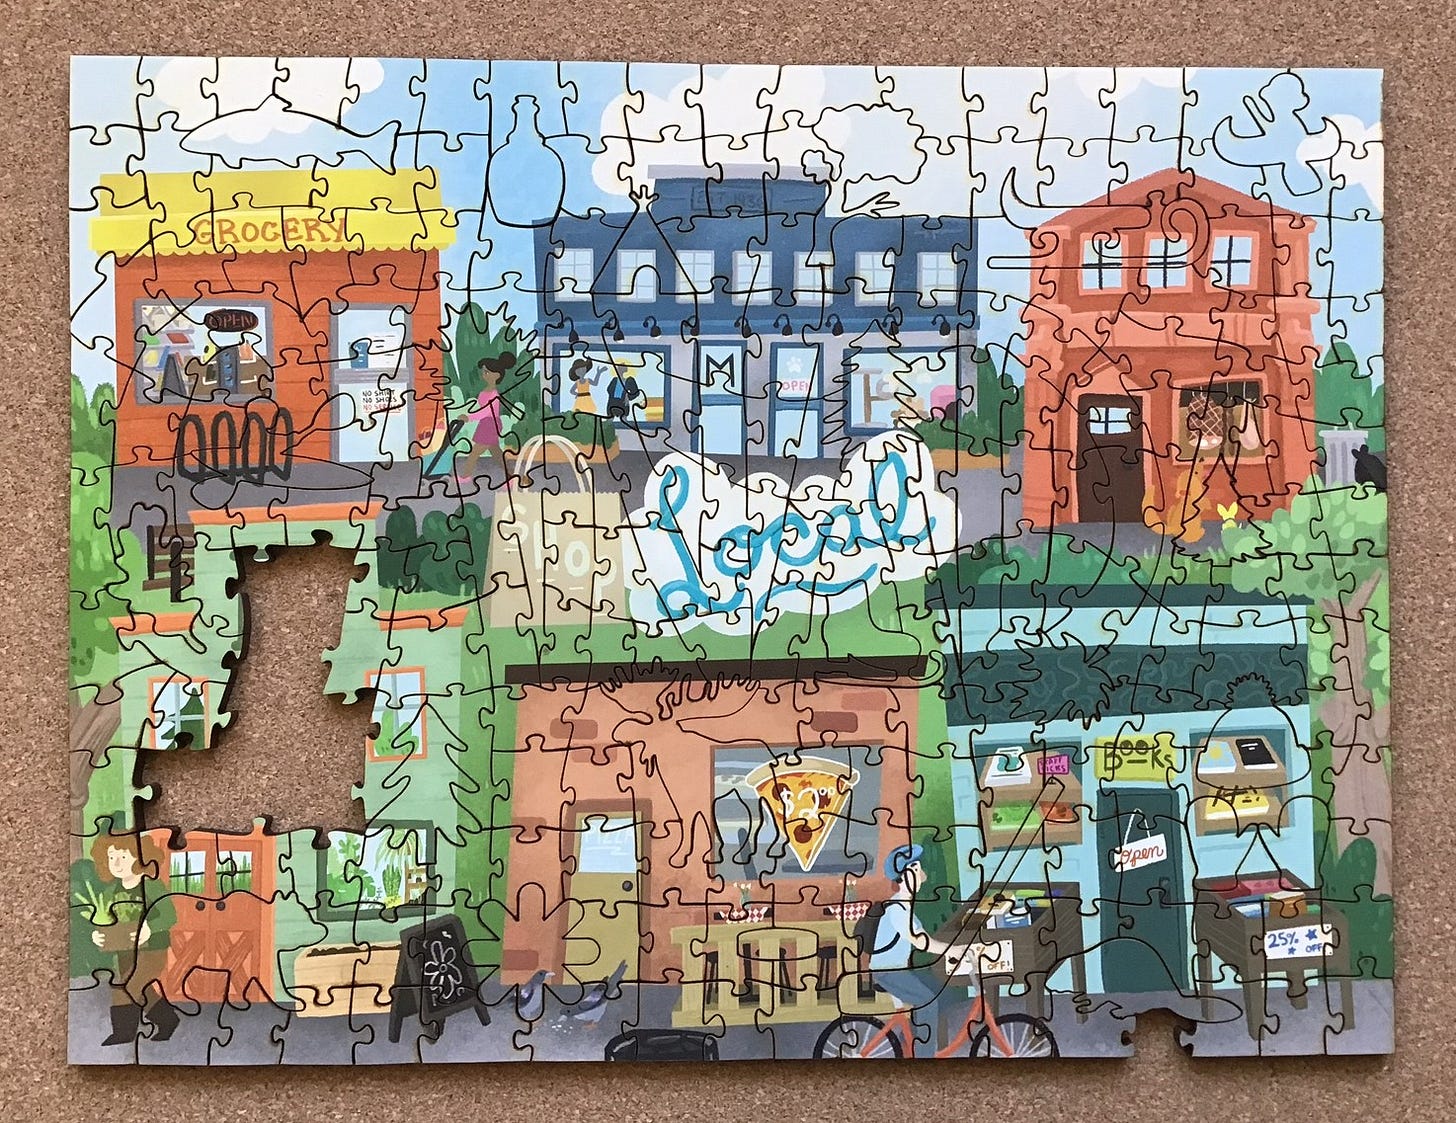
As you can see, the cut-lines are far less pronounced and there is very little smudging around them. The cut-lines show but do not dominate the image like they did with last year’s puzzles. This level of prominence is typical of most laser-cut puzzles. Also, the delicate light colours are able to hold their own without the muddiness that detracted from the puzzles made with the previous printing process. This is a HUGE improvement in Rocky Mountain Creators’ puzzle-making!

The improvement is even more apparent in the above totally-unfair maginification in which even the tiniest of flaws show up. I can see that there is still a small amount of smudging but that is because I am looking for flaws since I am writing a review. Most people assembling this puzzle probably wouldn’t notice it. And I was easily able to clean it off from my puzzle using a cotton swab dampened with rubbing alcohol.
Remember, at the beginning of this review I said that I considered the two puzzles I bought last year to be satisfactory despite their technical problems because of their low price and creative cutting designs. With these technical issuers resolved they have moved up from being just satisfactory to being very good value.
The company still currently has only two cutting patterns but I think they both are very good ones, for two entirely different reasons. As I understand it they were made by two different unnamed freelance designers. One pattern is whimsy-filled; the other has no whimsies but I found it to be unique and challenging. It is pretty easy to know which cutting pattern is used with which puzzles in their catalogue. The whimsy design is used for the landscape-orientation 270 piece puzzles and the non-whimsy challenging one is used for the 277 piece ones that have portrait orientation. In my case, that meant that the whimsy design was used for both the Lobster Traps and Shop Local puzzles.
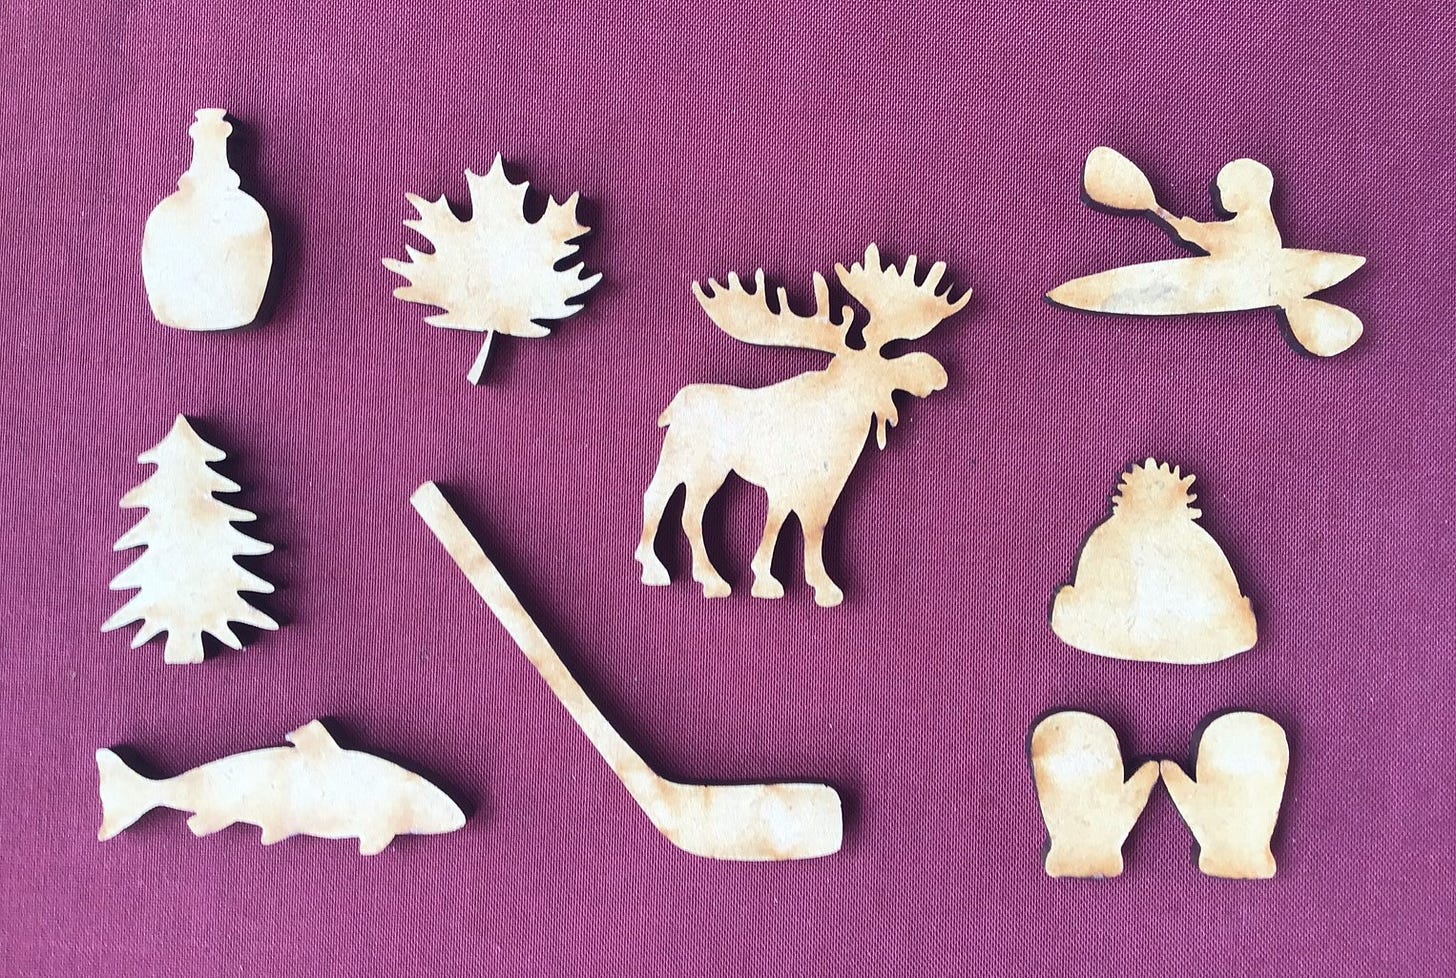
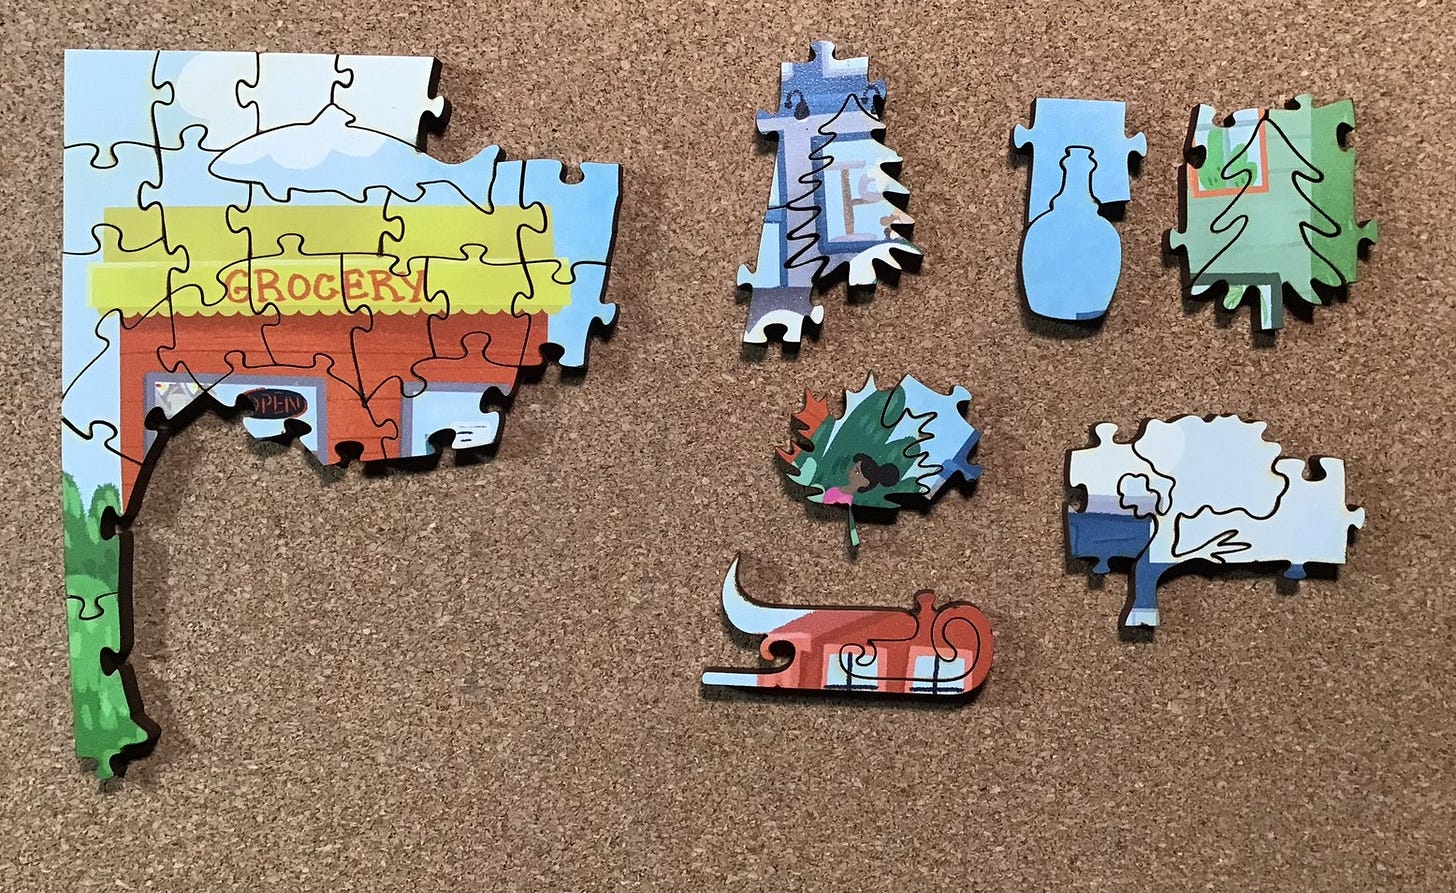
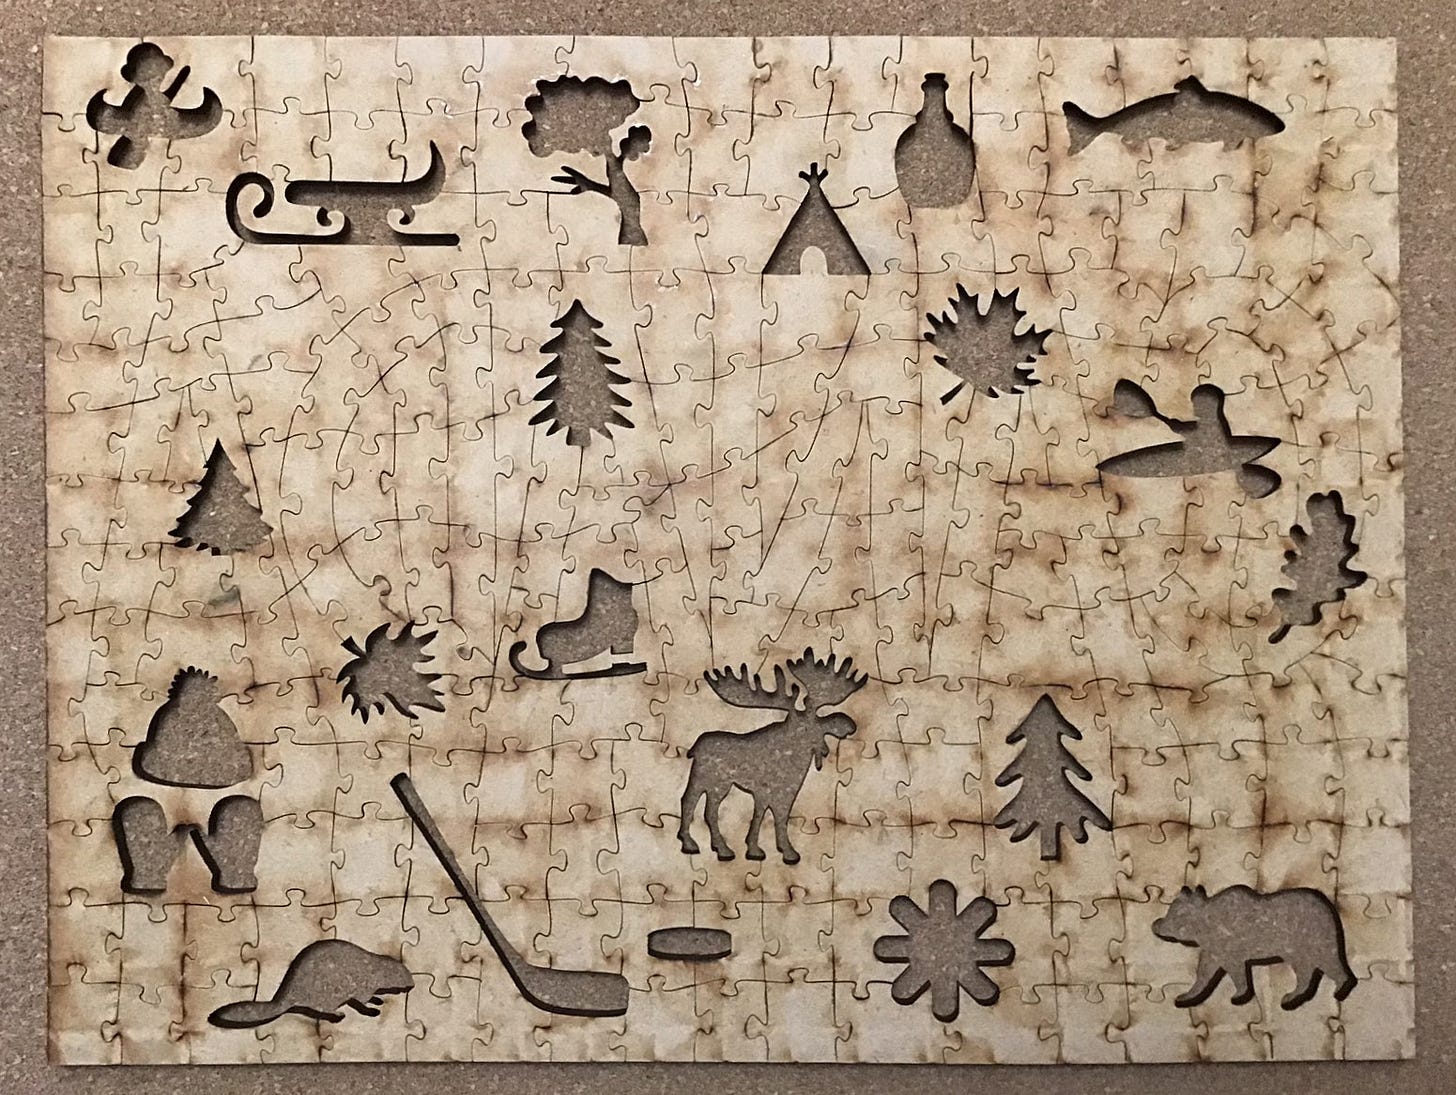
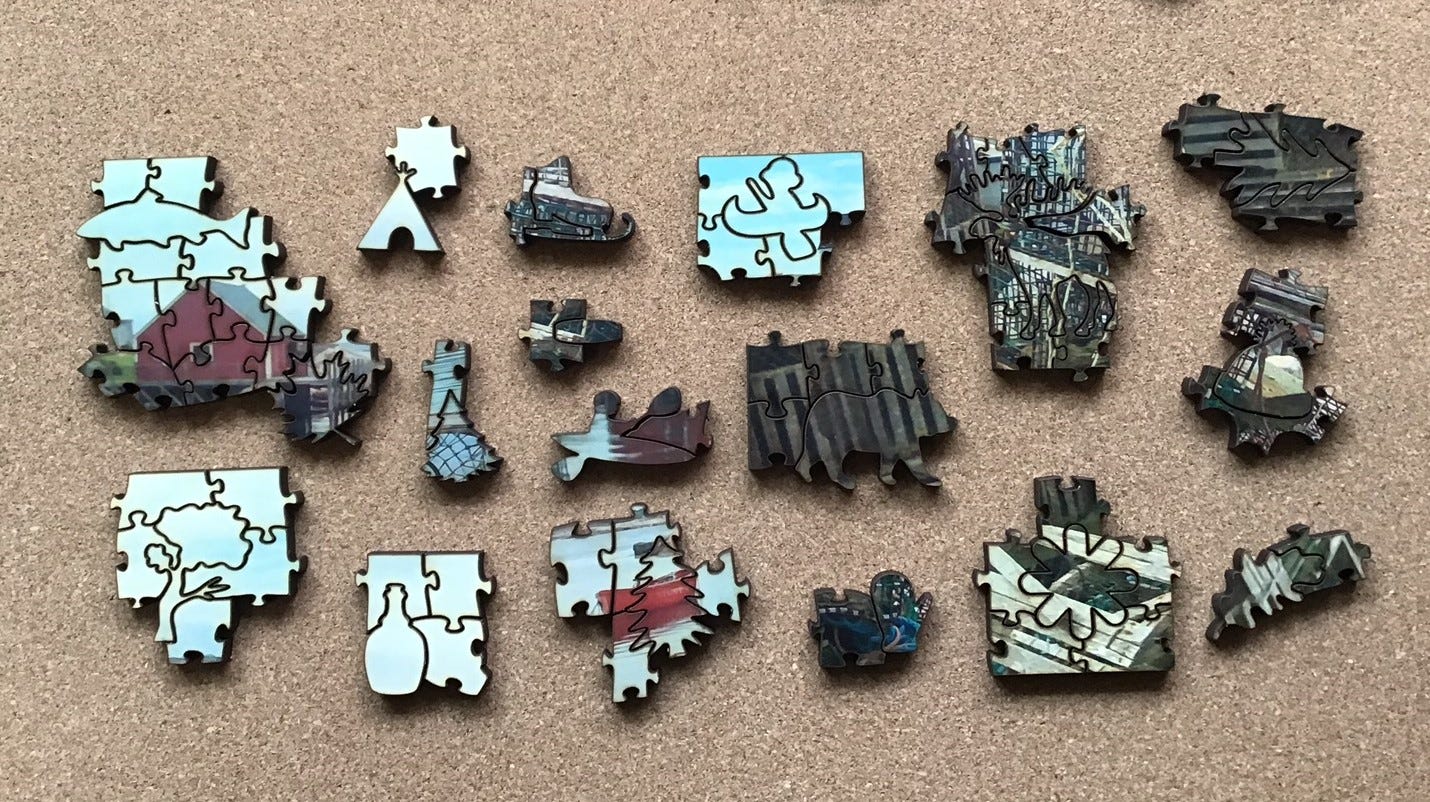
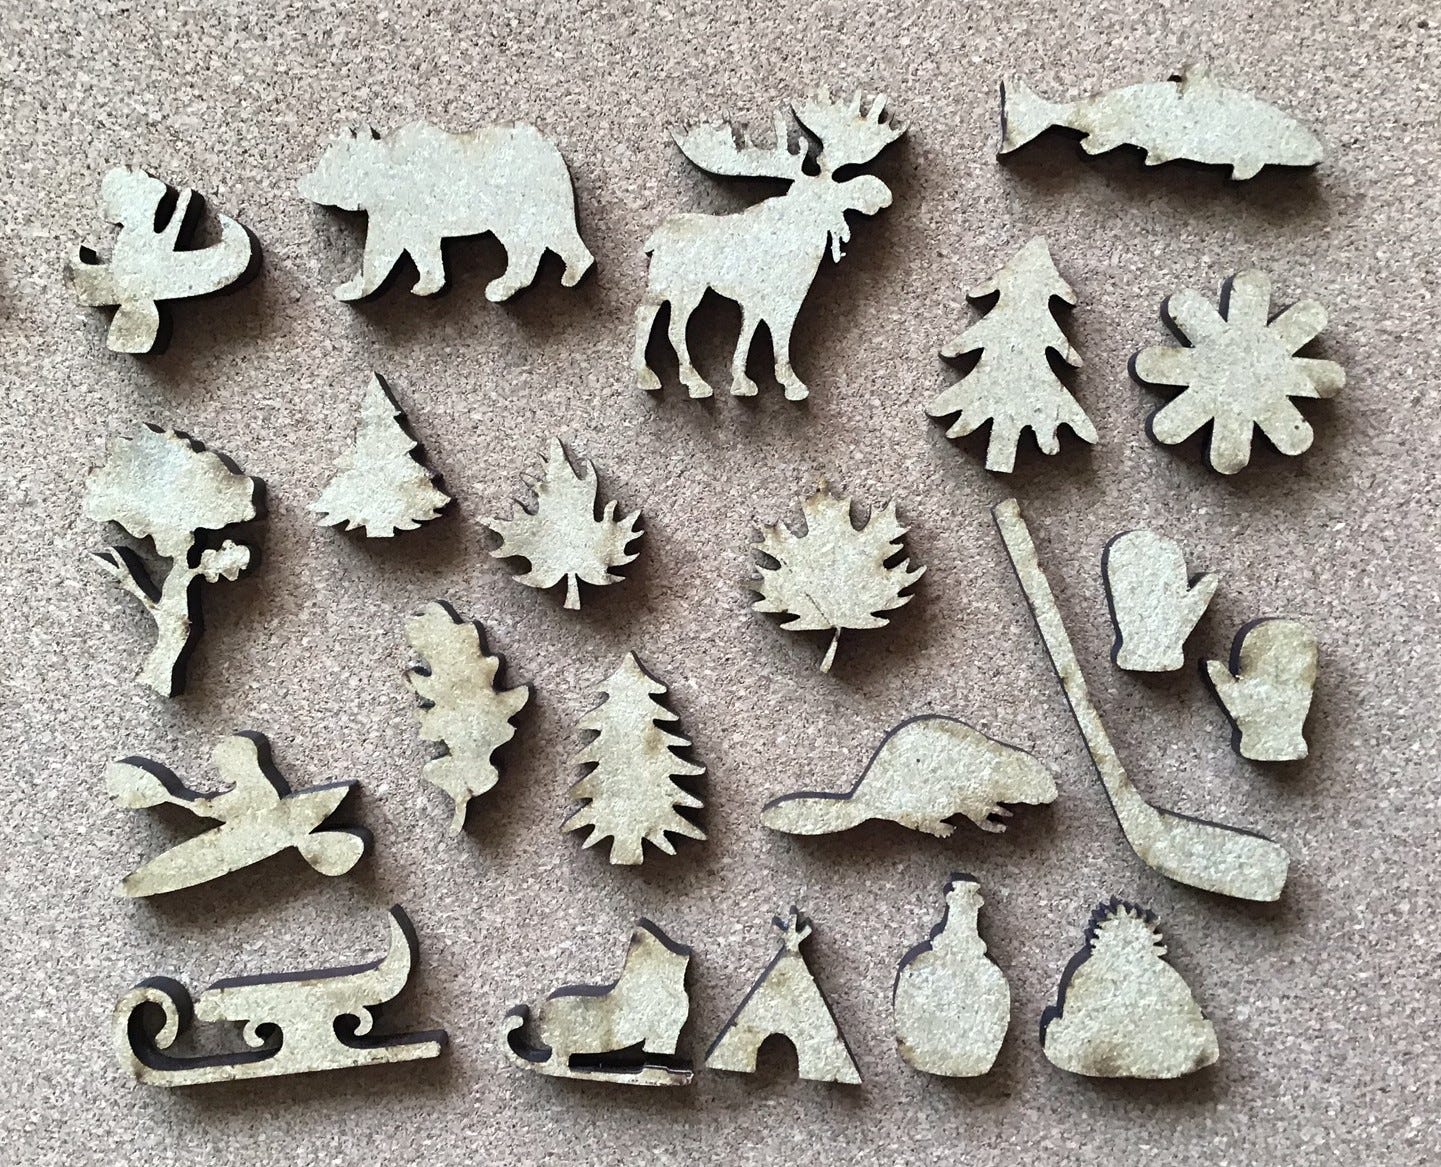
The whimsy cutting pattern has 23 single-piece figurals that have a Canadian theme. As you can see in the above picture, some are quite basic while others are more elaborate. All are attractive and instantly recognizable; none appear to be fragile. Mostly they seem to be randomly distributed, but in two cases (like the tuque and mittens above) they are placed in a logical relationship to each other.
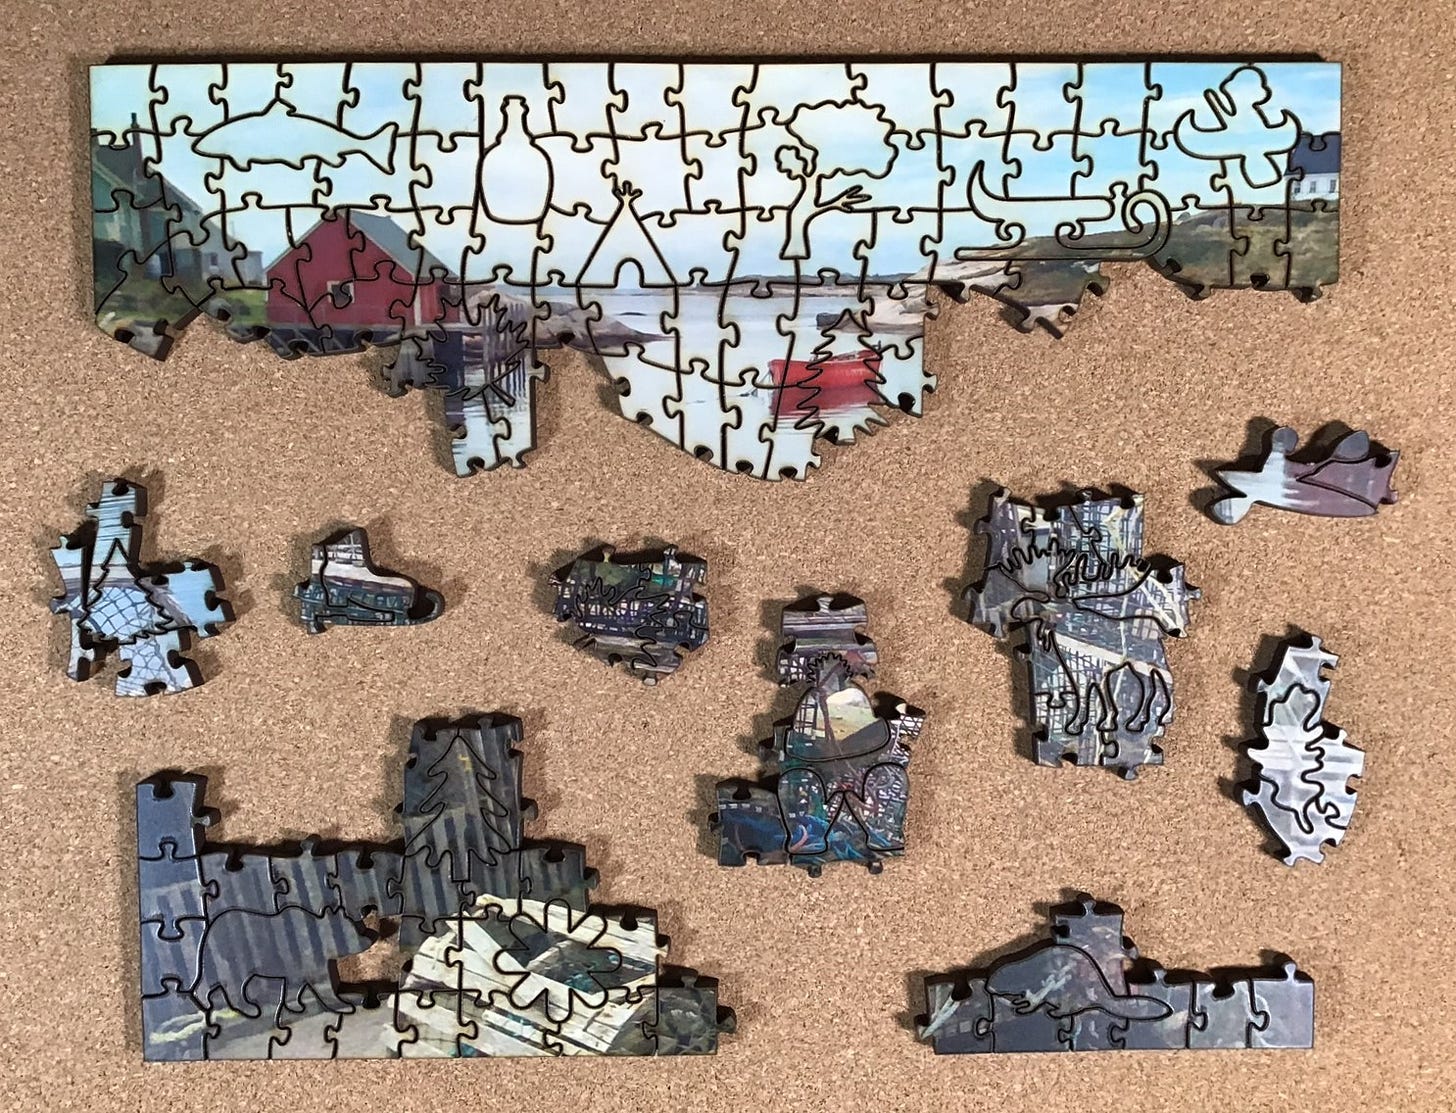
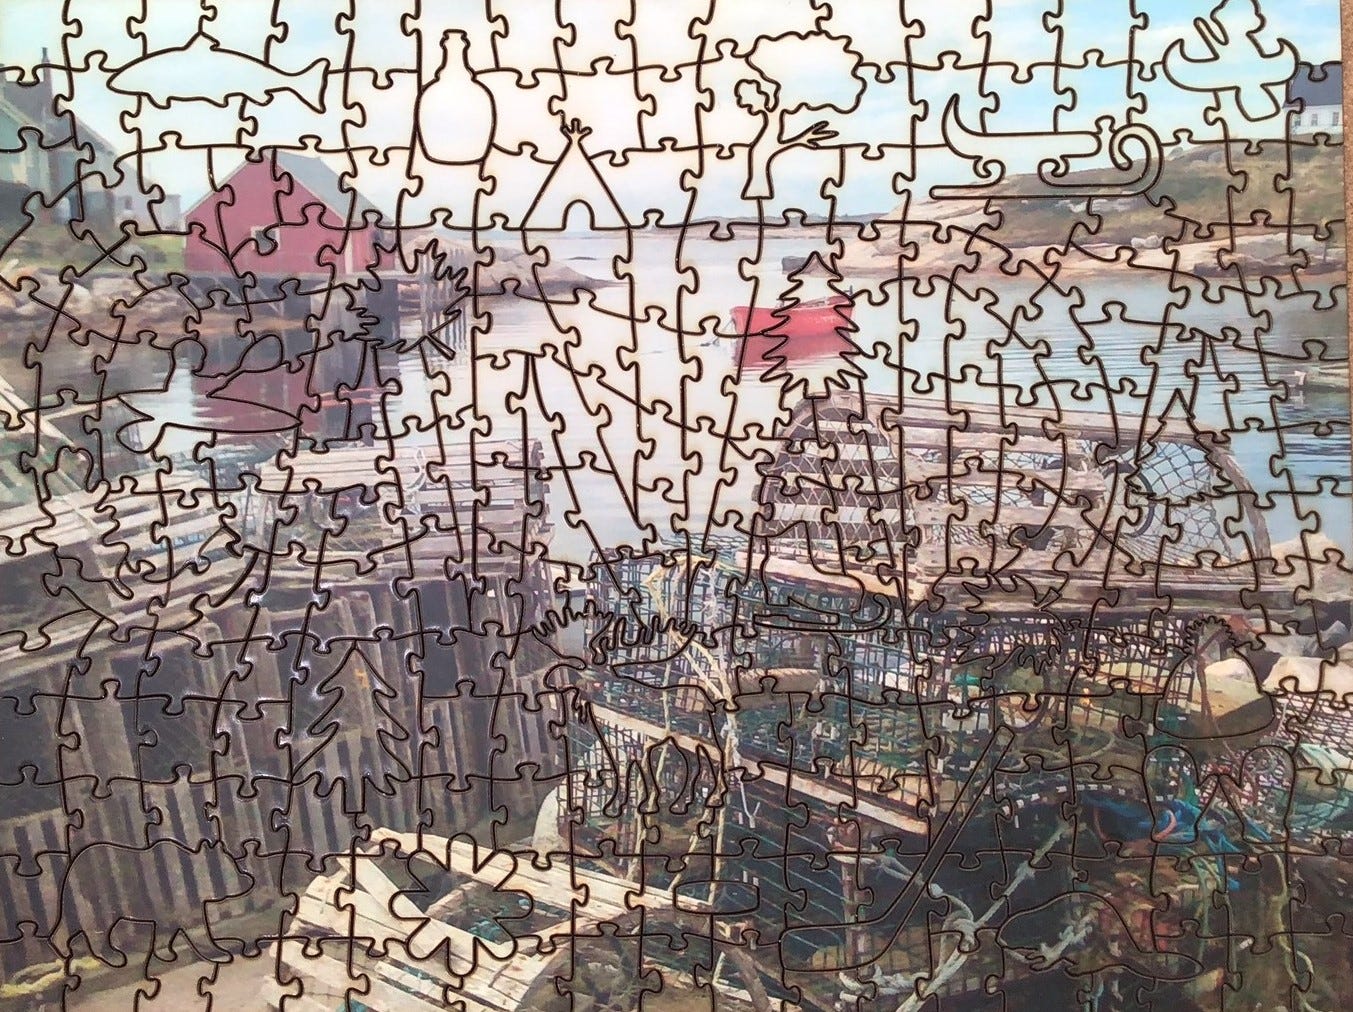
The non-figural pieces in puzzles that have whimsies are usually fully interlocking and often have rather grid-like cutting. I would describe this puzzle that way except that it has an interesting twist that I have never seen before: Some of the interlocking background pieces form a word. That, combined with the fact that all of the interlocking connectors are the same, made assembly somewhat more challenging and interesting than such a puzzle would usually be. Still, as whimsy puzzles tend to be, it was more of a fun assembly than a challenging one.
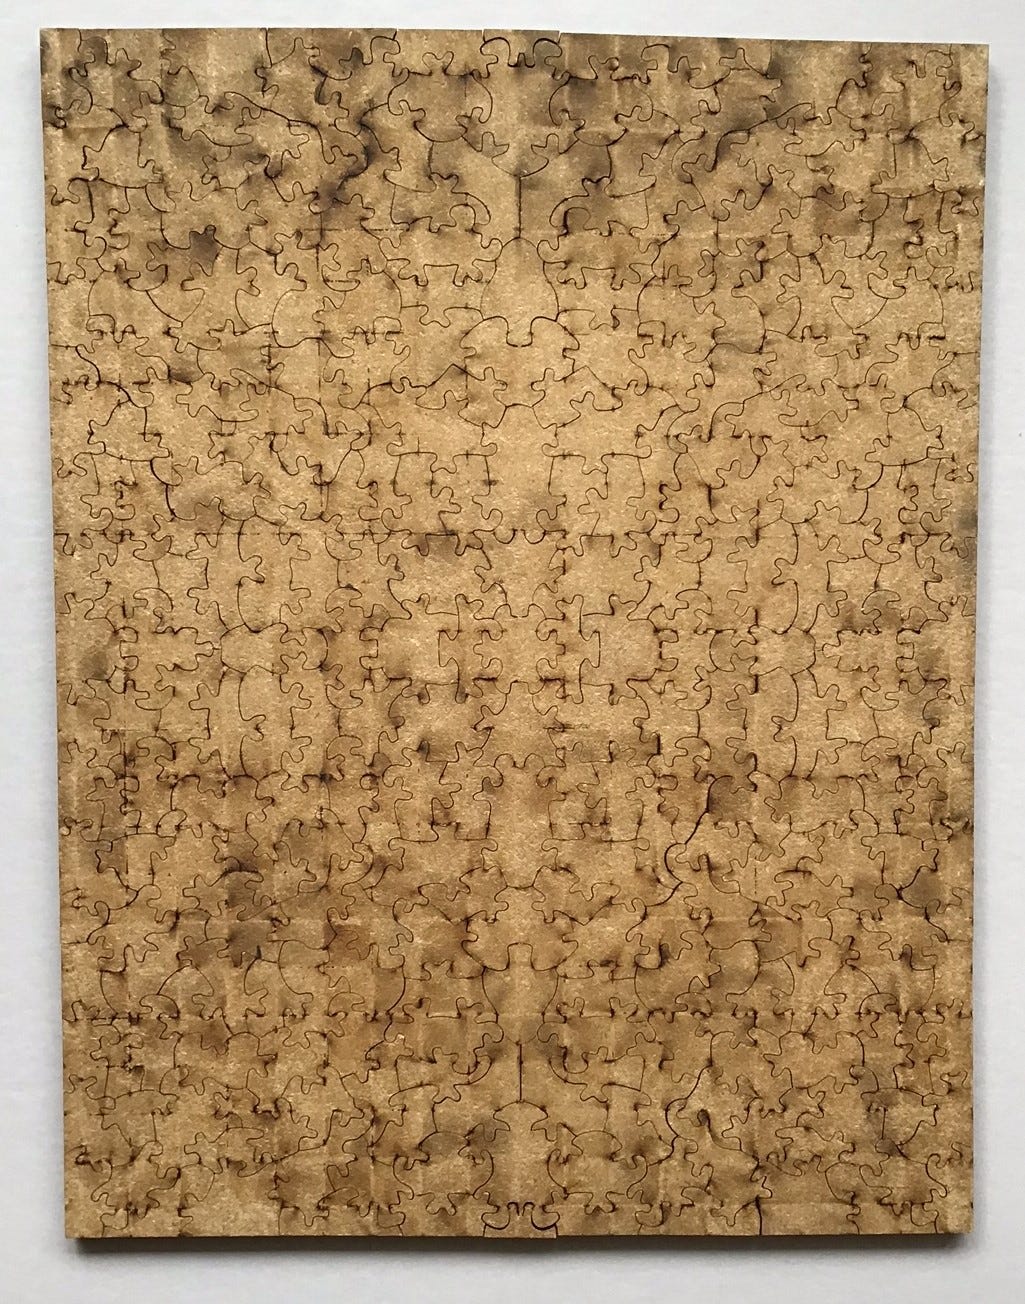
The company’s non-whimsical cutting design on the other hand is both very clever and a challenge. It uses a cutting style that I have also not encountered before (although I still think of myself as being relatively new to jigsaw puzzling.) It is not tessellation, but perhaps is a cousin to it. This design is used in Cabin in the Woods, the first of the Rocky Mountain Creators puzzles that I had assembled. I almost gave up. In fact I did give up, but left it on the board while I began writing this review-essay. It was a few days later that I discovered the answer was staring me in the face.
I won’t say much more here in the review section of this essay about what makes the cutting pattern challenging but it is all explained in the Cabin in the Woods assembly walk-though below the Spoiler Alert. I’ll just say that it involves a geometric principle that creates abundant opportunities for false fits and which once figured out assembly helps a lot but still leave further challenges. As you can see in the following photo, that cutting pattern also creates an array of very attractive pieces to add to the enjoyment of assembly.

Rocky Mountain Puzzles is introducing two new cutting designs this summer. The first will be a whimsy-based one with cowboy and rodeo figural pieces. You won’t be surprised to hear that it too will be released in July in conjunction the company’s appearance at the Calgary Stampede and will be used for puzzles in which the images are professional photographs of Stampede rodeo and chuckwagon racing events. The other one will be for round puzzles. Robert told me that one is still in development but they expect to have it ready for August. The first puzzle using it will have an image reminiscent of a stain glass window.
When I was assembling Shop Local something occurred that would usually be unfortunate, but for puzzle review purposes allows me to report on a matter that I cannot usually comment on – customer service. The puzzle that was sent to me for review was missing a piece! When I e-mailed Robert Steed his said that having this happen to me was a Murphy’s Law occurrence: They have made and sold over 2500 puzzles and this is only their third missing piece that has been reported to them. I had sent him a photo showing which piece was missing (and assured him that I had double- and triple-checked all around the not-recently-vacuumed living room where I assembled the puzzle on a puzzle-board with a lip around it, and that I have no pets to gobble down pieces.) He sent me a replacement piece that fits perfectly. I am confident that I was not treated any differently than a regular customer would have been.
Given all of the above, at $50CDN each I think that these puzzles are very good value, especially now that the technical shortcomings have been resolved. However there is still the limitation of having only a limited number of cutting designs and they are re-used, so care needs to be taken if you want to avoid getting puzzles with duplicate cutting designs.
I can’t recall how much shipping cost to me here in Canada; I just remember thinking at the time that it didn’t seem to be very expensive (but of course, most of the puzzles I buy come to me from the US or Britain and that is always expensive.) They do ship internationally and I asked Robert about the cost for that. Boxes sent to the US have cost $20-25CDN, and to Britain in the $35 range. Two puzzles can be shipped for the same cost as for one.
I am very much looking forward to seeing if images will be available that suit my tastes for the two new cutting designs they will be releasing this summer. If the new cutting designs show as much creativity as these first two they should be winners.
Spoiler alert
Below here there are text and photos that show features in the puzzle designs that some people might prefer to discover for themselves. In particular, I recommend not looking at the part about assembly of Cabin in the Woods if you have already decided to buy a puzzle with its cutting pattern based upon my above rather vague description. Much of its appeal is in needing to figure out the tricks of its cutting design.
.
.
.
.
.
Shop Local assembly
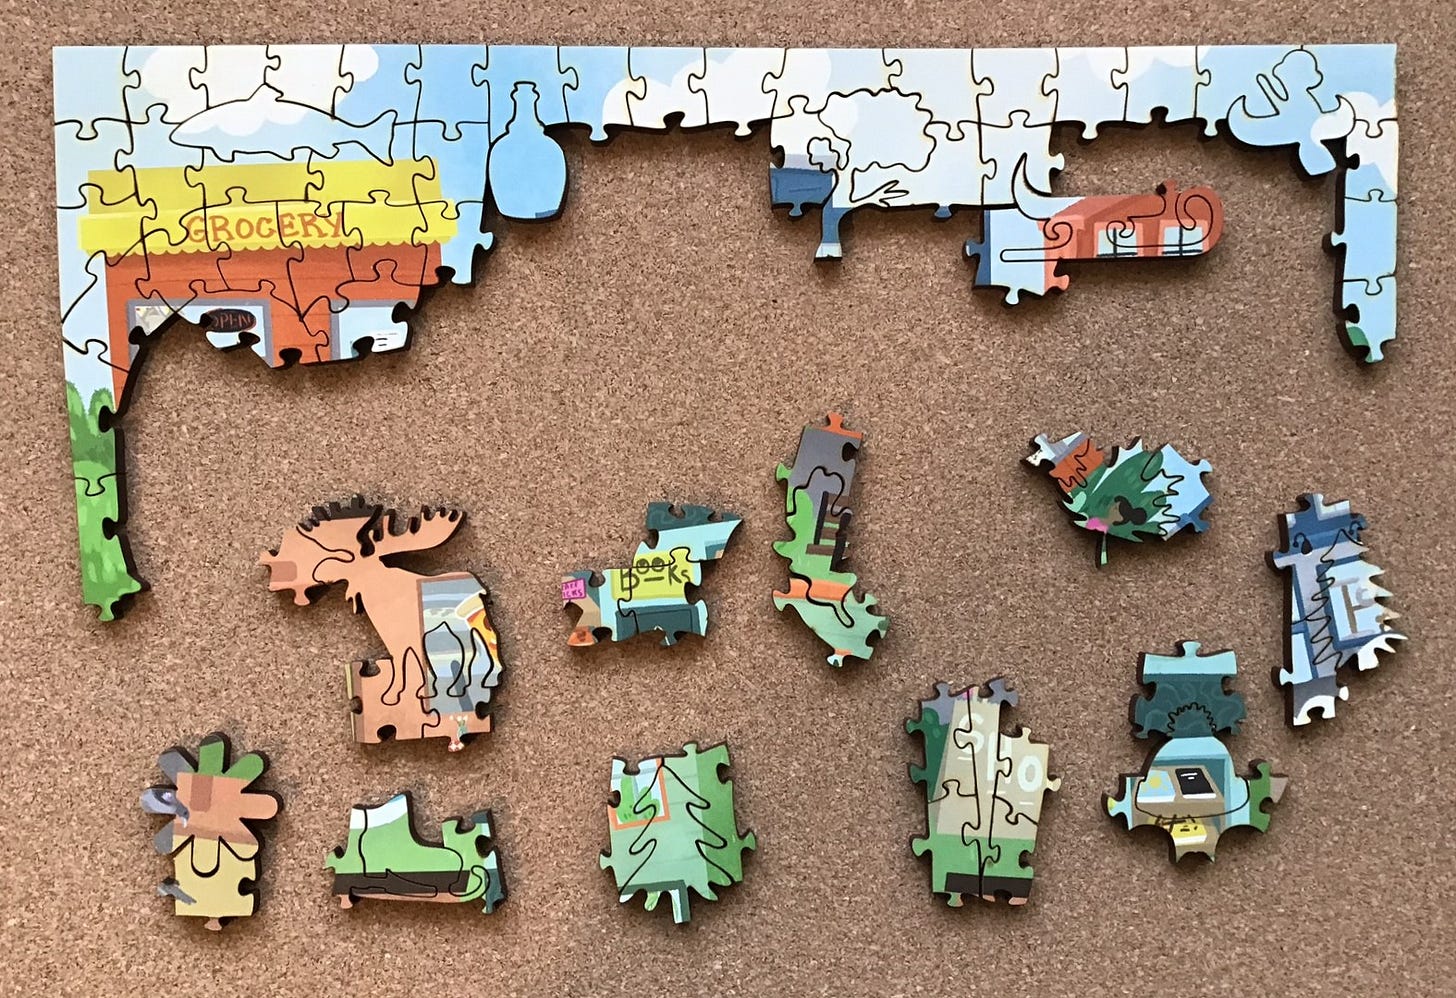
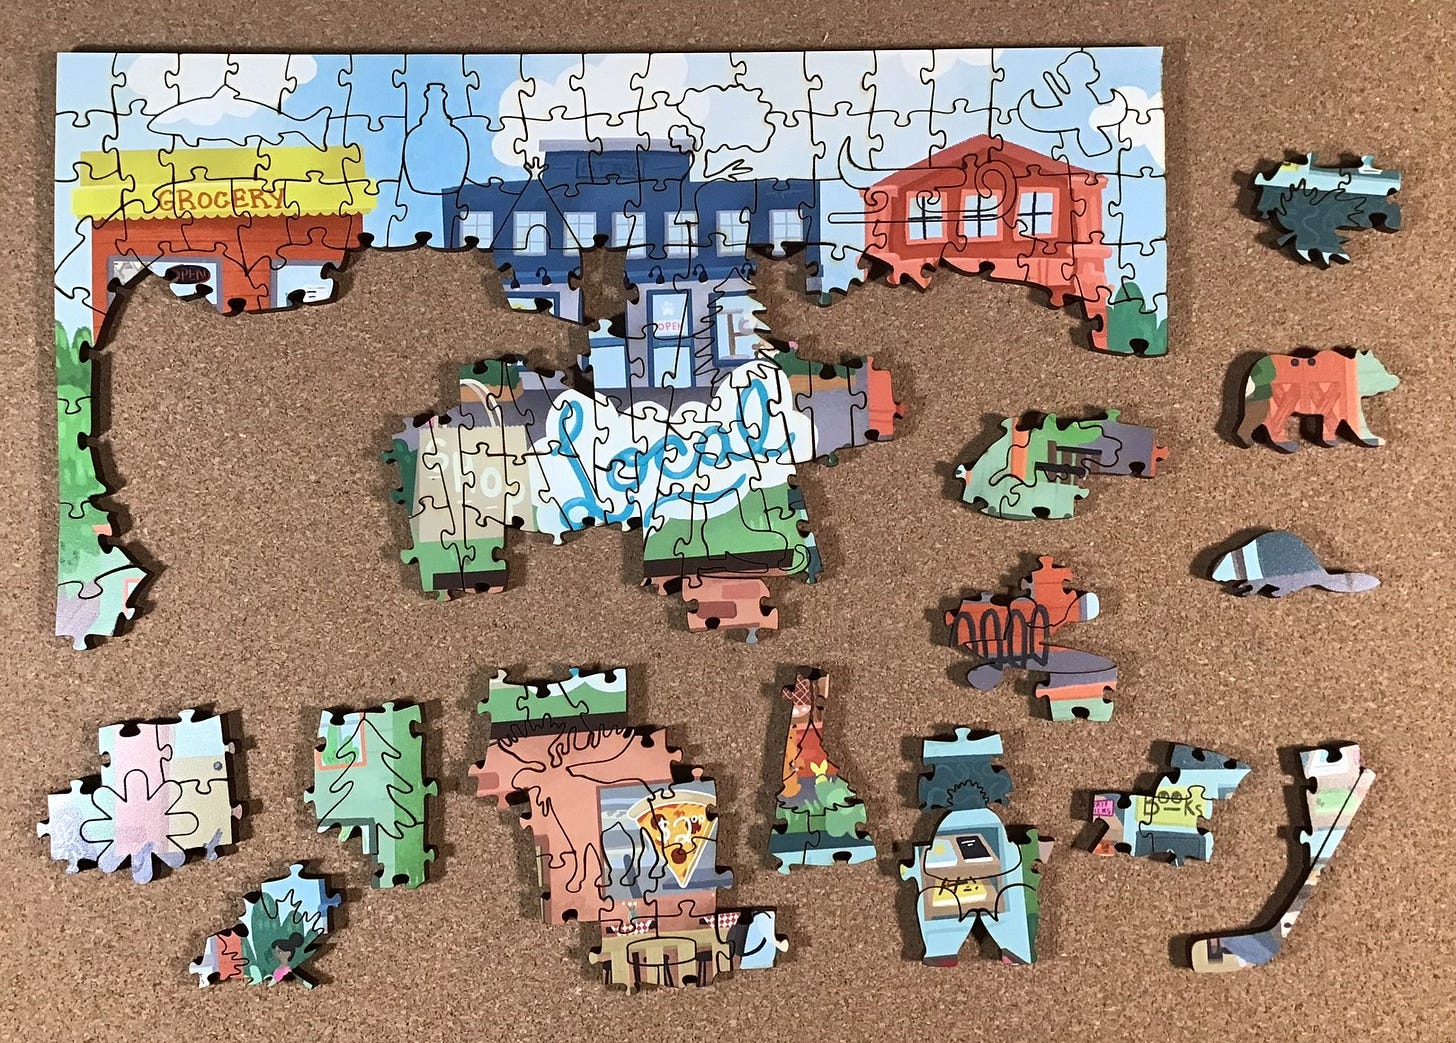
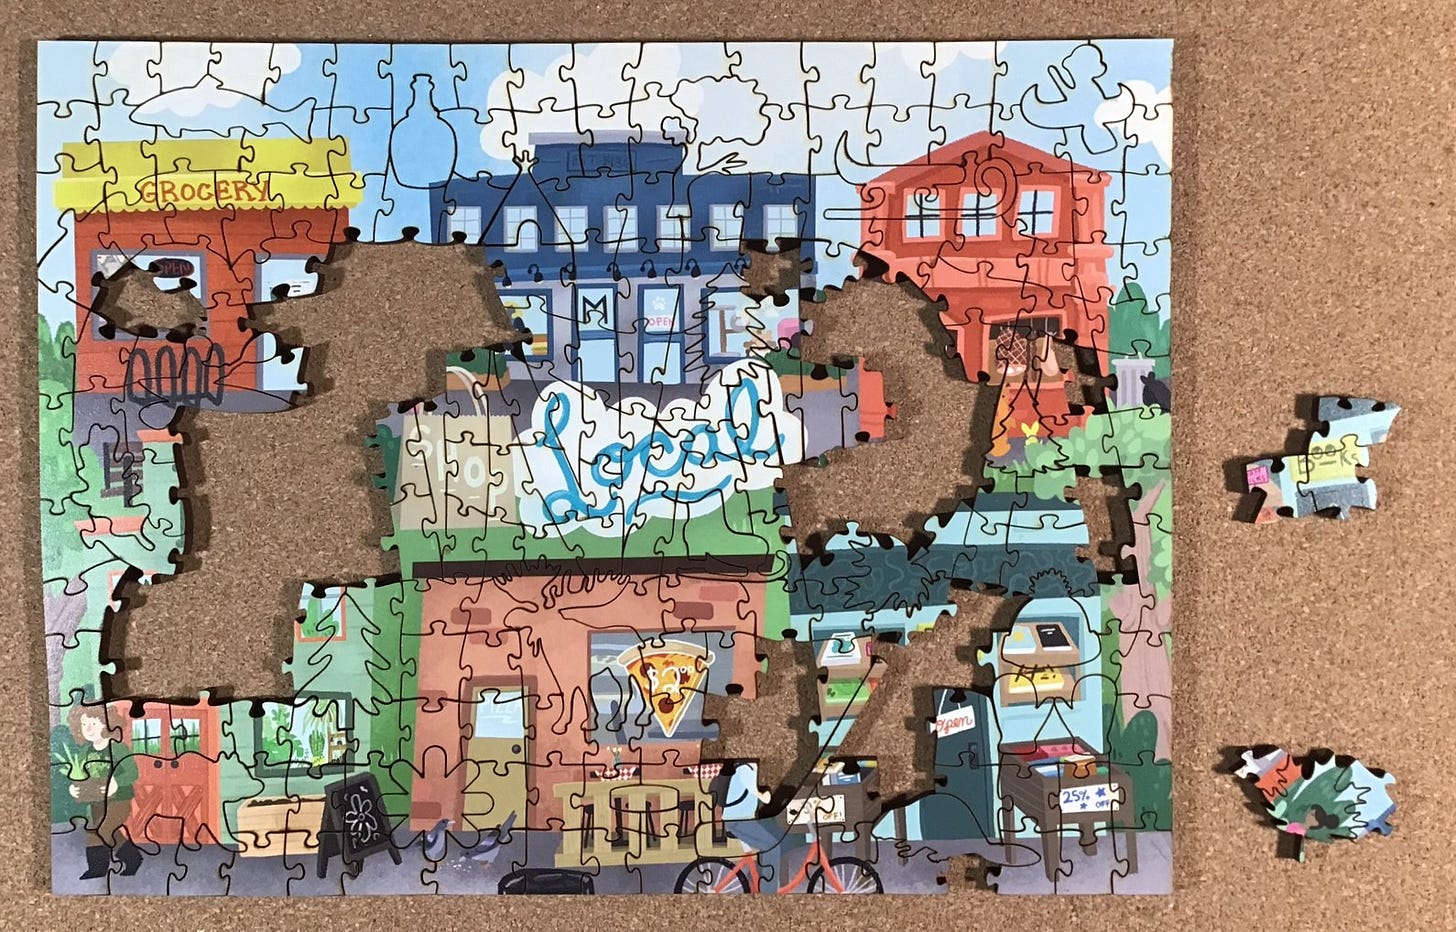
This puzzle has the same cutting design as Lobster Traps. Because my assembly experience with that one is shown and described below I will just give you a quick photographic tour of my assembly progression for this one.
I had expected it to go really quickly, and indeed my previous experience with its cutting design did help, but it was still a bit challenging and a fun build.
Cabin in the Woods assembly
[Note: When reading the following comments and seeing the photos please remember that the technical problems they depict no longer apply to puzzles made by Rocky Mountain Creators.]
Rocky Mountain Creators’ website is rather vague about the cutting design for this puzzle saying only “277 irregular shaped puzzle pieces” and the company does not show images of it on the site. When the puzzle arrived I covered up the pictures as shown above, taking care not to even glance at them. So I began assembly of this puzzle with an even more vague recollection than usual about its cutting style or what its image would be other than that it was a photograph of its eponymous Cabin in the Woods.
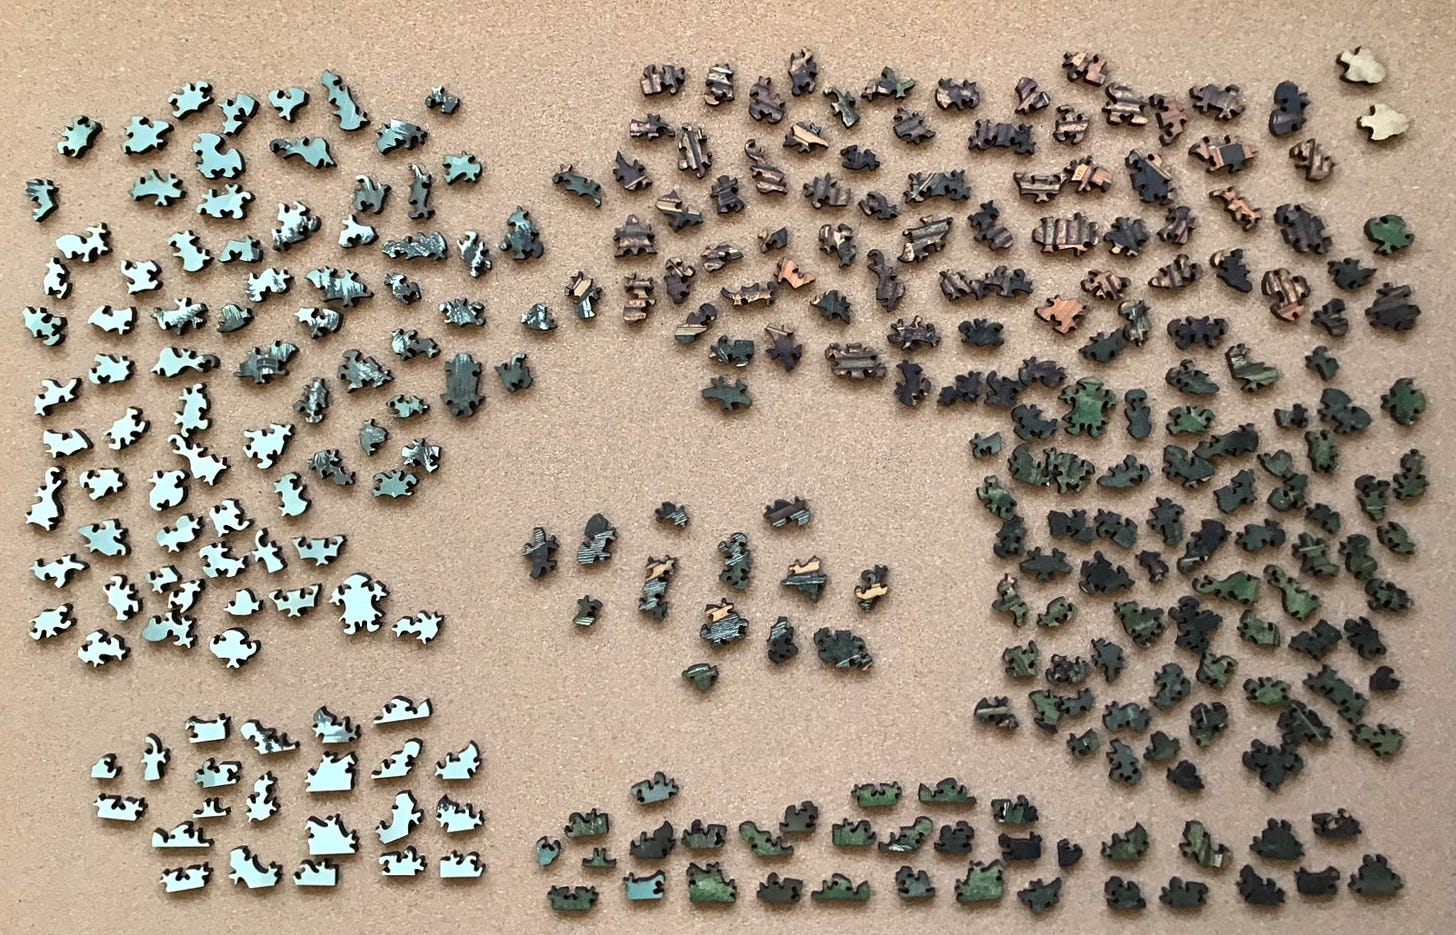
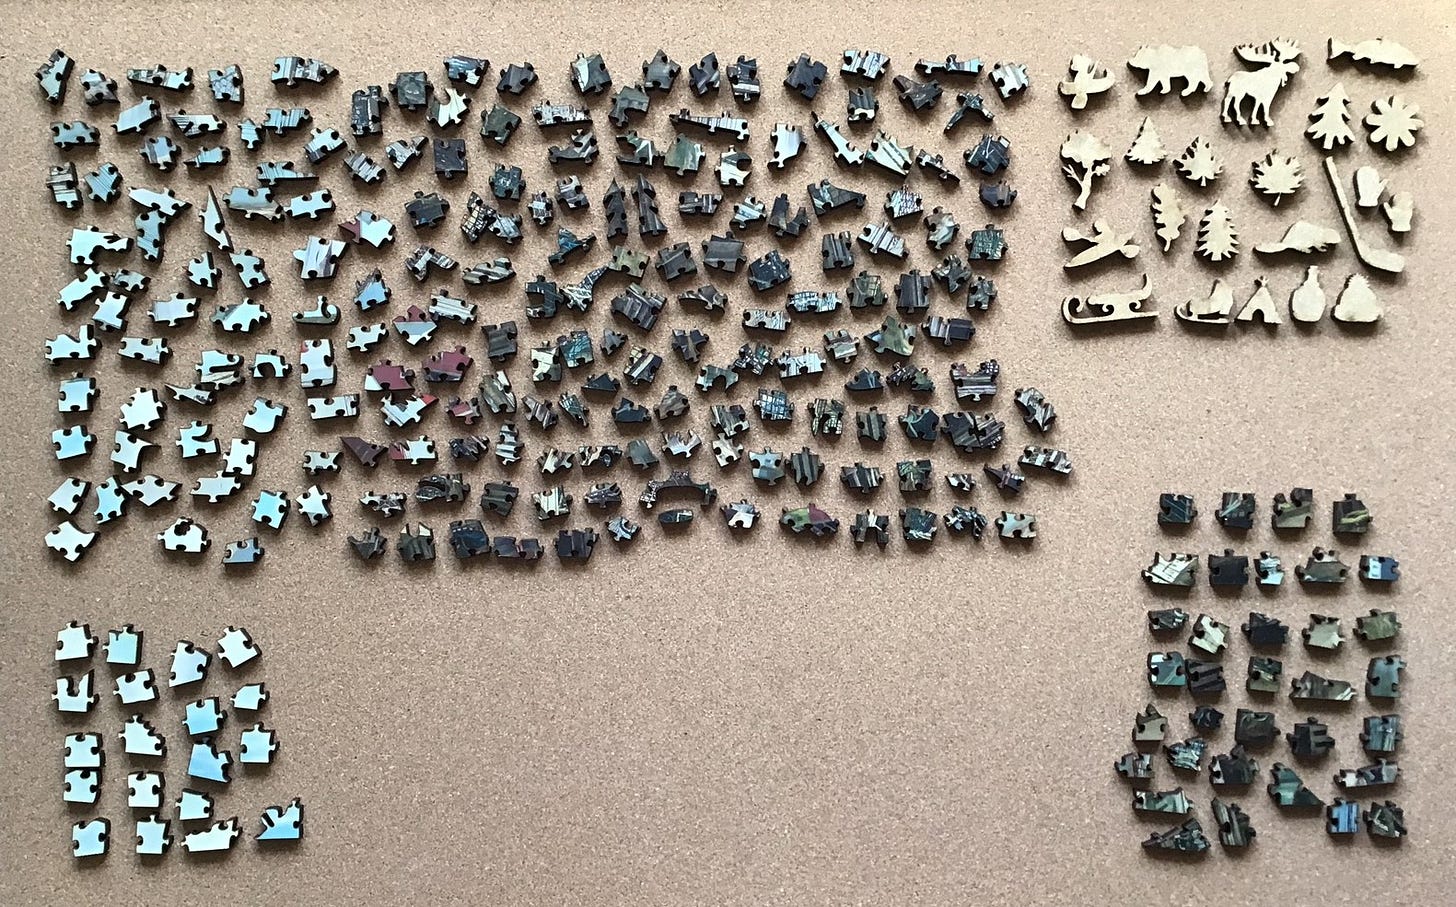
My initial flipping was followed by my usual colour sorting, and separating out the whimsies and potential edge pieces. It was notable that there were no whimsies (except two that I thought were possible ones, shown in the upper-right of the following photo.) But the designer seemed to really like symmetrically-shaped pieces. There were quite a few of those.
There were a fair number of pieces that looked like a drab light blue sky, and some with distant trees set against that sky, and a lot of ones that were very dark green. I supposed that was to be expected from a photo of a cabin in the woods. A few of the pieces had a distinctive pattern of squiggly parallel lines that were lighter in colour than the others and reminded me of ripples on the water. I separated those out because they looked like a good place to begin.
Those “water ripples” turned out to be wood shingles on the roof of the titular cabin. I had also separated out the lighter-brown pieces that looked like planks so that seemed like the logical next step in making colour- and texture-based sub-assemblies.
I tried to work out from there, hoping to be able to recognize and assemble all of the log-cabin pieces. But that turned out to be much more slow-going than I expected. Just connecting my two sub-assemblies together seemed worth celebrating with a photo:
The log cabin pieces did not come together easily at all. It seemed to me that I could build a real log cabin faster than assembling this image of one. I decided to give up on my plan to begin with puzzle’s focus of attention and go with the traditional approach of assembling the edge pieces first. So I took a break from the cabin and began working on the bluish sky.
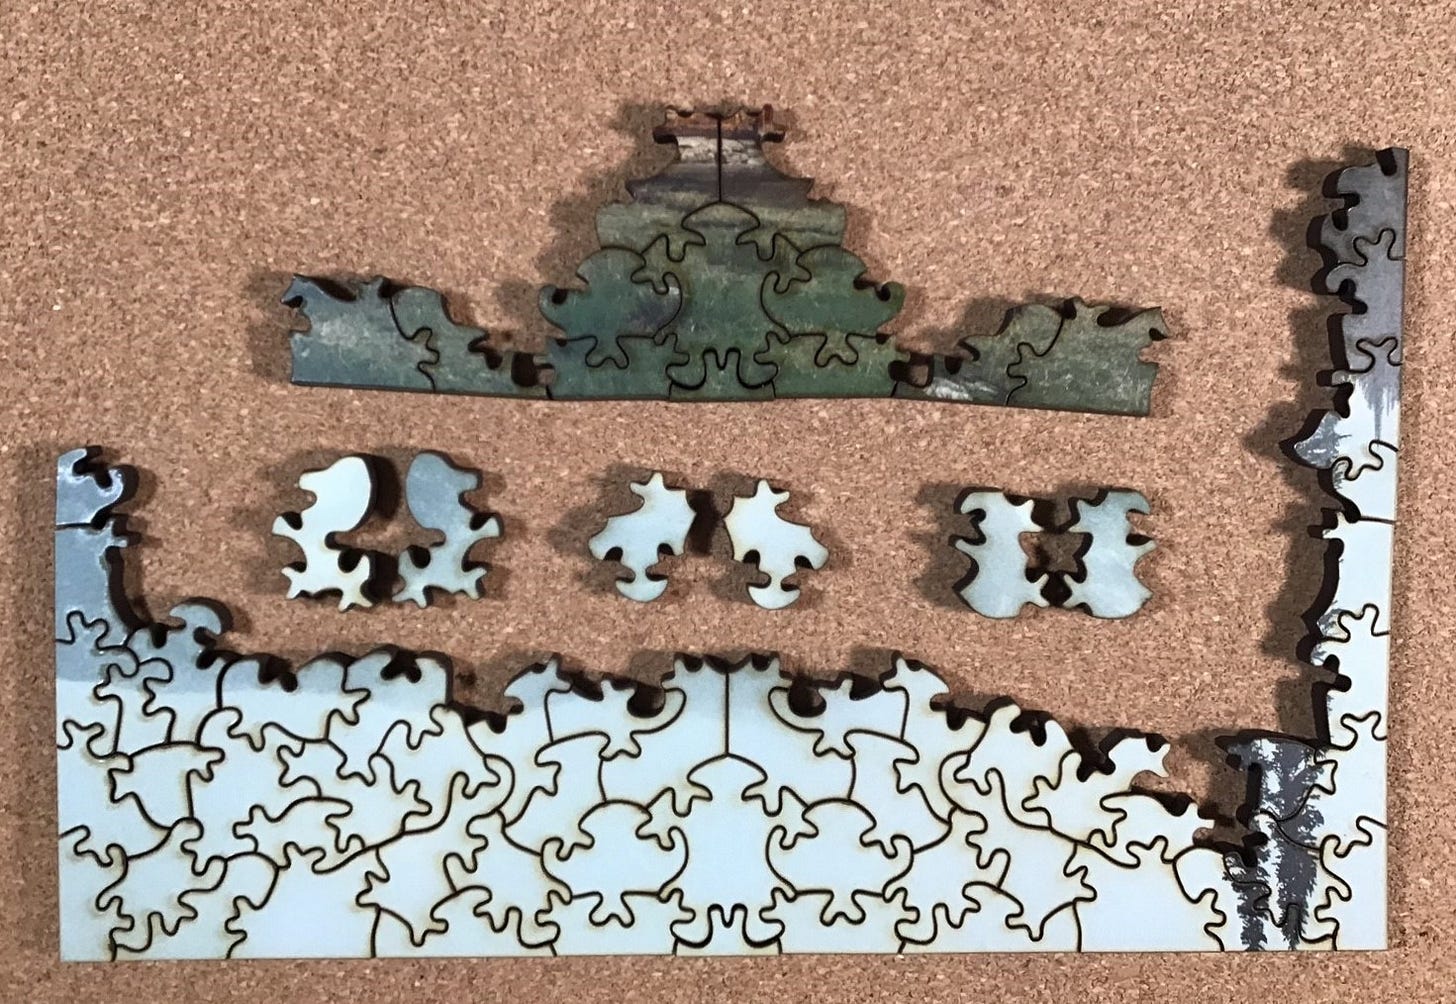
I noticed something interesting: The sky pieces were laterally symmetrical - look at the bottom row in the above photo. When I found a piece I began looking for one whose shape was a mirror image of it. That really speeded things up. Then I noticed that there were also the same shapes of matching pieces on what would be the bottom of the puzzle:
Then I found the same phenomenon with regard to the edge pieces on the puzzle’s sides. Like along the bottom and the top, there were two mirror-image edge pieces opposite each other. There wasn’t much risk of confusing the sky pieces for the ground pieces, but with the deep-green side pieces the was potential to put pieces in on the wrong side. But this really speeded up assembly, especially when I realized I could apply this “two-fer” approach to the cabin and other interior pieces.
[I should have taken a photo about here but assembly seemed to be going so well that I forgot.]
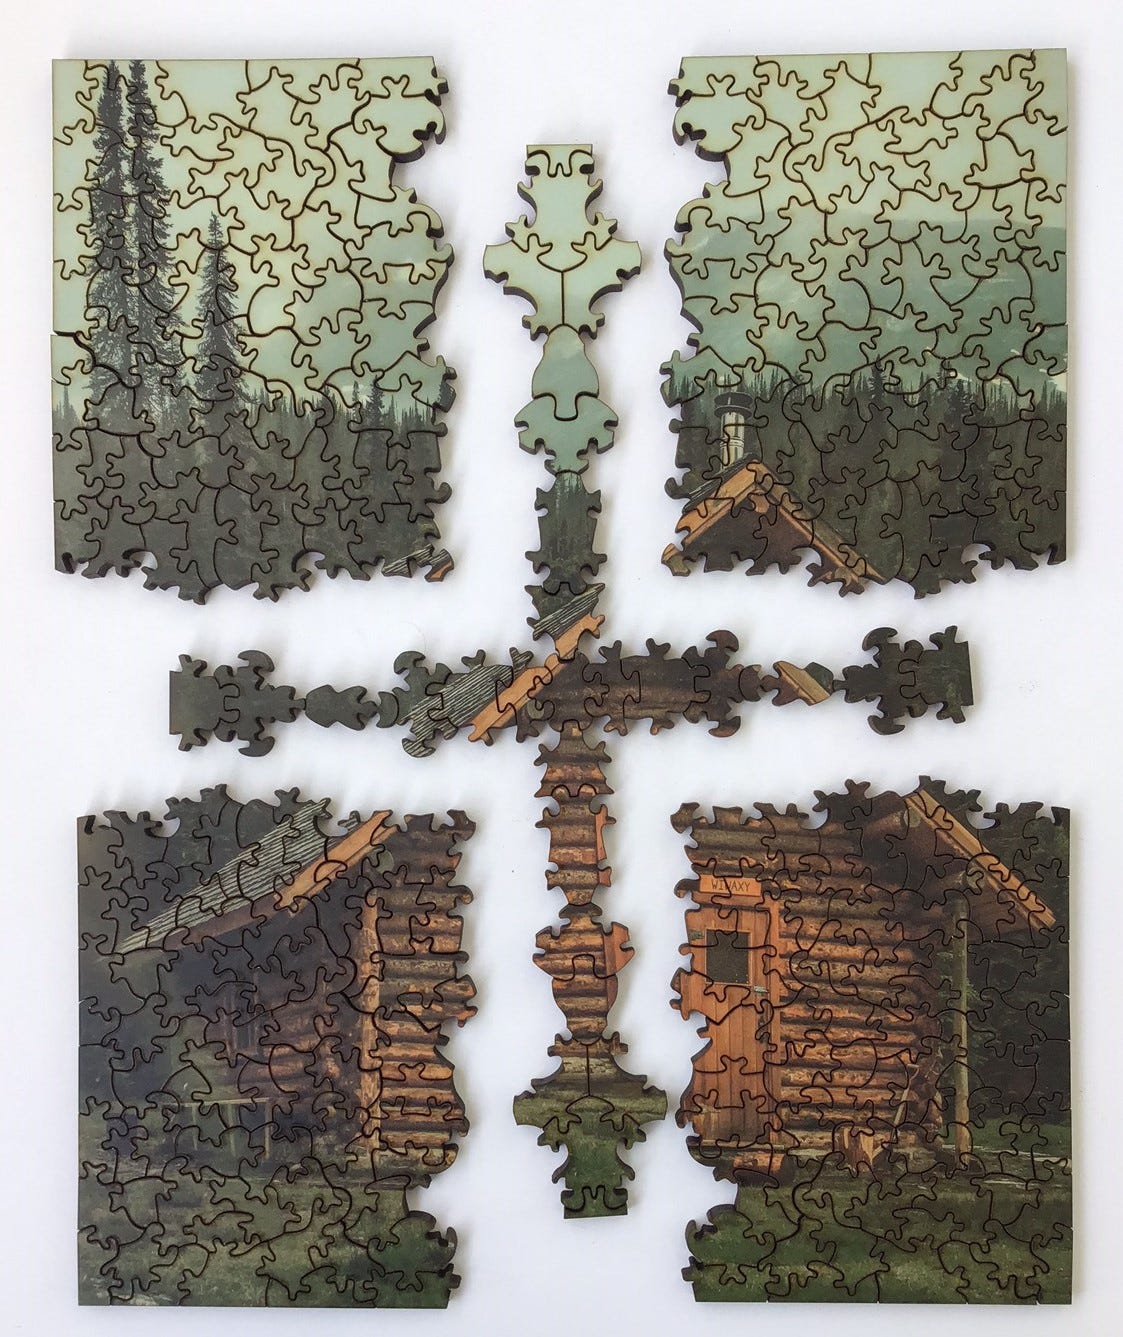
Assembly was getting faster but more complicated. When I looked carefully at the cabin there was a column of laterally symmetrical pieces going up along the left of the door, and a row of horizontally symmetrical pieces two rows above the Wiwaxy sign above the cabin’s door. I looked it up – this is called quadrilateral symmetry. That means that throughout the puzzle there will be such pairs of pieces, and mirrors of those pairs (except for the pairs that are on the vertical and horizontal axes.) Yikes! This cutting design is much more sophisticated than I expected.
Knowing about all that symmetry enabled me to take great leaps forward. I had been making progress on the edges but it turns out that one of them was mixed in with the the non-edge pieces. Knowing exactly what shape to look for helped me to find it. Woo-hoo! The edges were complete!
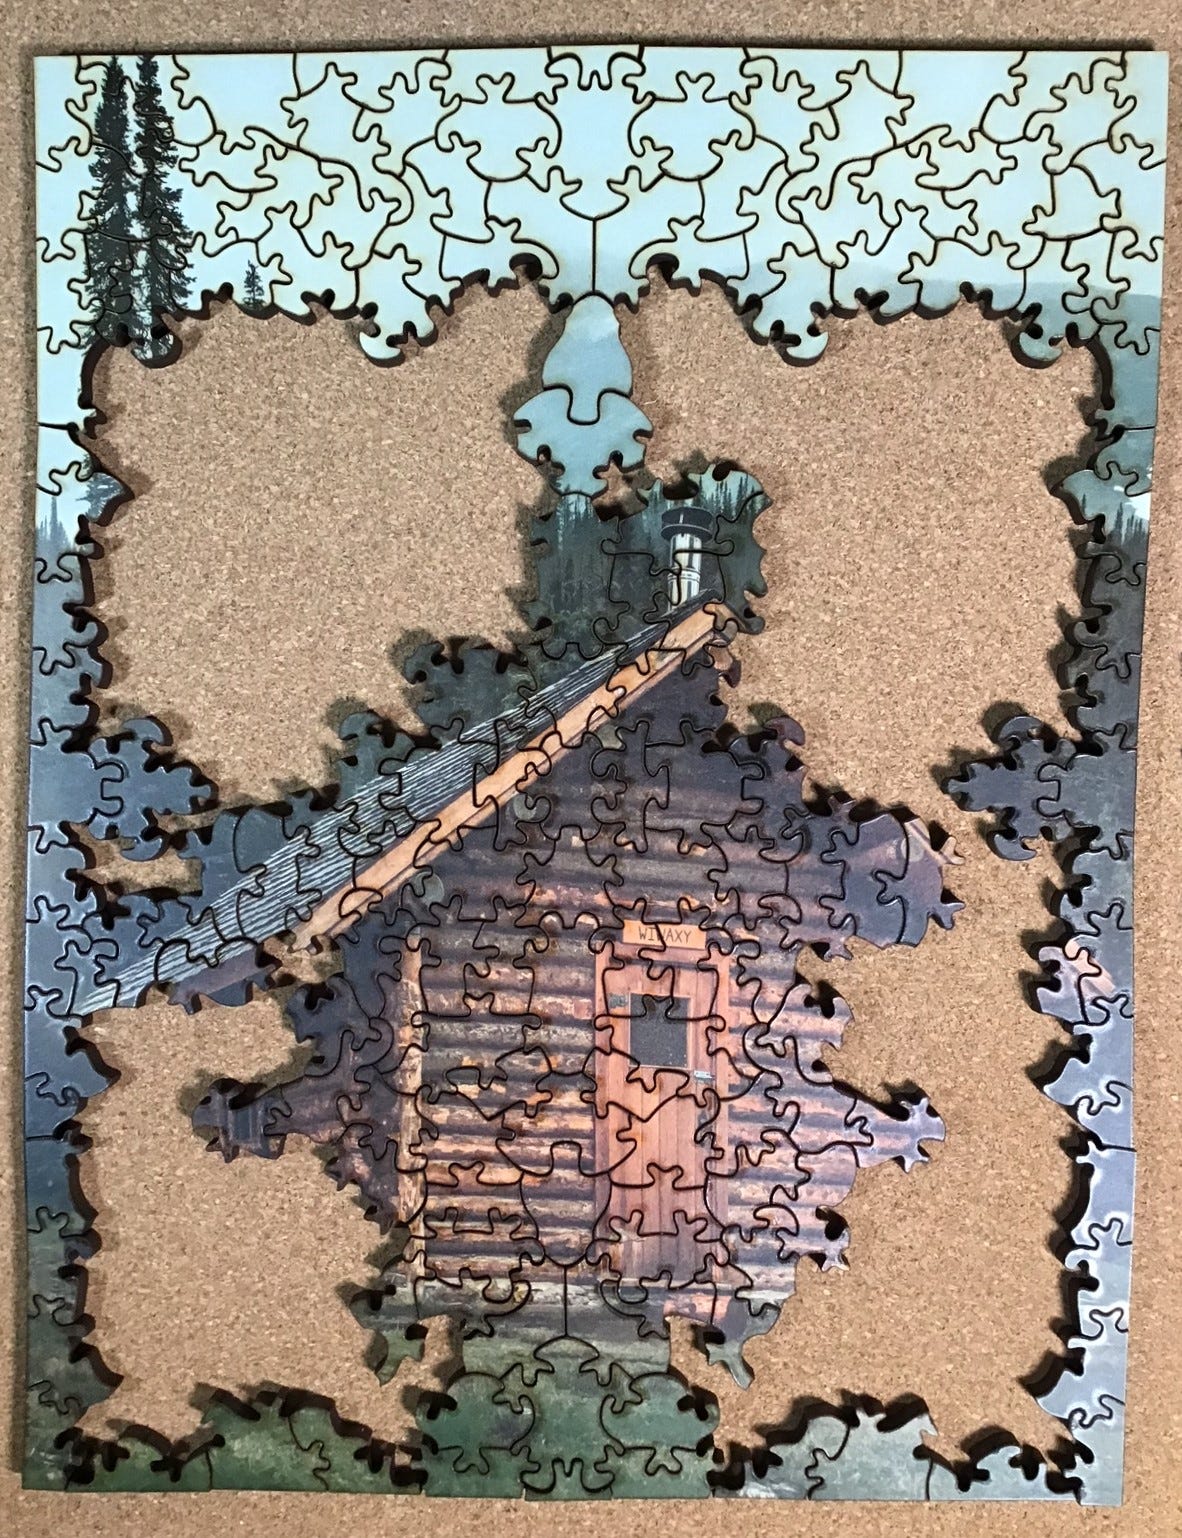
Since each of the pieces in the middle horizontal row would be symmetrical, and have a mirror image twin, I tried to find the pieces to complete that row. But at this stage there were too many similarly dark green pieces for them to hide among so I began looking for the mirror-image twins of pieces I had already placed, and completing the sky first because there were relatively few of those pieces left. Whenever I found a piece, instead of putting it in place right away I would look for its horizontal mirror-image twin, and their vertical mirrors, since I would knew exactly where they would go too. This was a very different kind of puzzle assembly than anything I have done before.
I was able to place a few more pieces and then the trouble began. I began to have pieces that, according to their shape and colour, should easily fall into place. But they didn’t. I began to realize that having most of the pieces with an exact twin and two mirror images means that there are a lot of opportunities for false fits and I had already made a lot of them.
All of the loose pieces in the following photo are matched up with their counterparts but none of them fit into the places where they look like they should go.
Assembly now meant trying to locate the incorrectly placed pieces or pairs. It was very slow going! At this point feelings of frustration began to set in and I began to think that I would not be able to complete this puzzle.
It was at this stage that I became even more aware of the shortcomings of the puzzle’s printing compared to the original photograph. Previously I had been more aware of its darkness but now I found myself blaming my false-fits on the absence of detail in the puzzle’s image. You will notice that the biggest problem was with the dark-gren forest pieces. Sometimes the correct piece didn’t seem like as good of a colour- or texture-match as the incorrect one that I had removed. I only knew that it was the correct piece by the fact that the falsely-placed one had been hard to remove from its neighbouring pieces and the new one slid into place easily.
When I did track a false-fit down it sometimes enabled several adjoining pieces to be placed properly. That gave me hope that I could do this. But then I would get stuck again. Finally I was down to just four pieces that would not go into place:
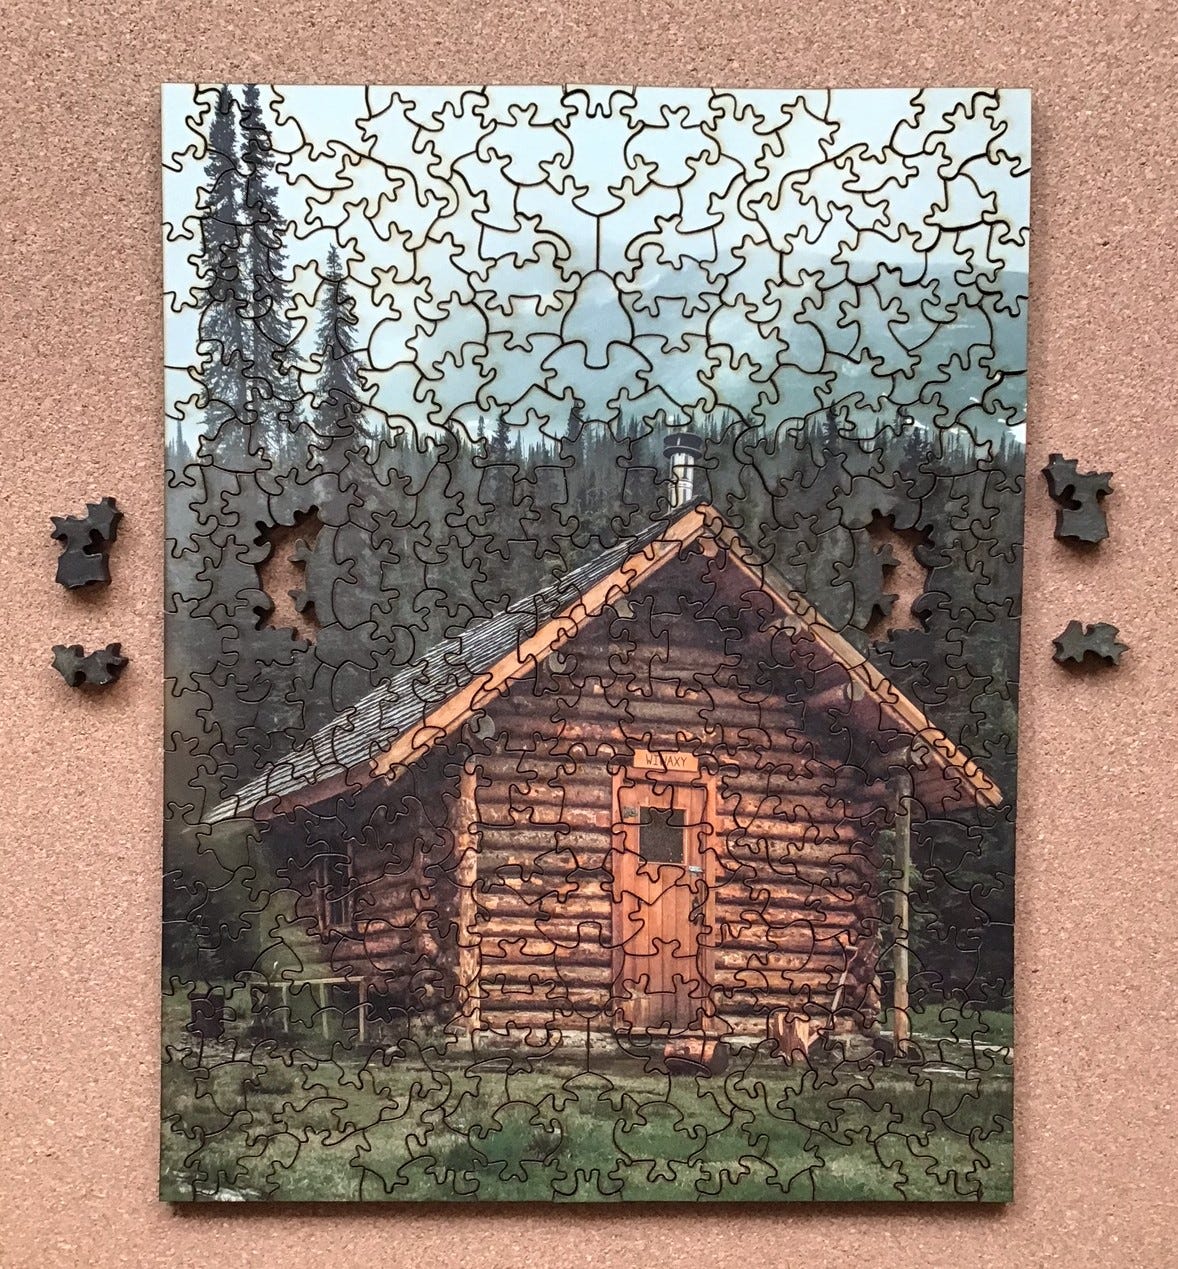
After confirming that all of the pieces that were adjacent to the voids appeared to be correctly placed (i.e., they came out and went back in easily) the frustration got to me. I gave up and began another puzzle. But I moved the nearly-assembled puzzle to my small cork-board, mainly so that I could take more photos for this essay, but also because I had a vague feeling that I must be missing something really simple.
And two days later I figured it out! I had gotten so wrapped up with tracking down the false fits that I hadn’t noticed that these two pairs, when put together, create two vertically symmetrical pieces. All I needed to do was put the pair on the left into the void on the right, and vice versa. Et voilà!
I had great satisfaction in completing this puzzle but I blame much of the difficulty on the poor printing quality and the extensive smudging. I will not want to do this puzzle again, but I would probably enjoy doing another puzzle with this cutting pattern if it wasn’t so dark and had a sharp image to help me avoid all of the false fits.
Lobster Traps assembly experience
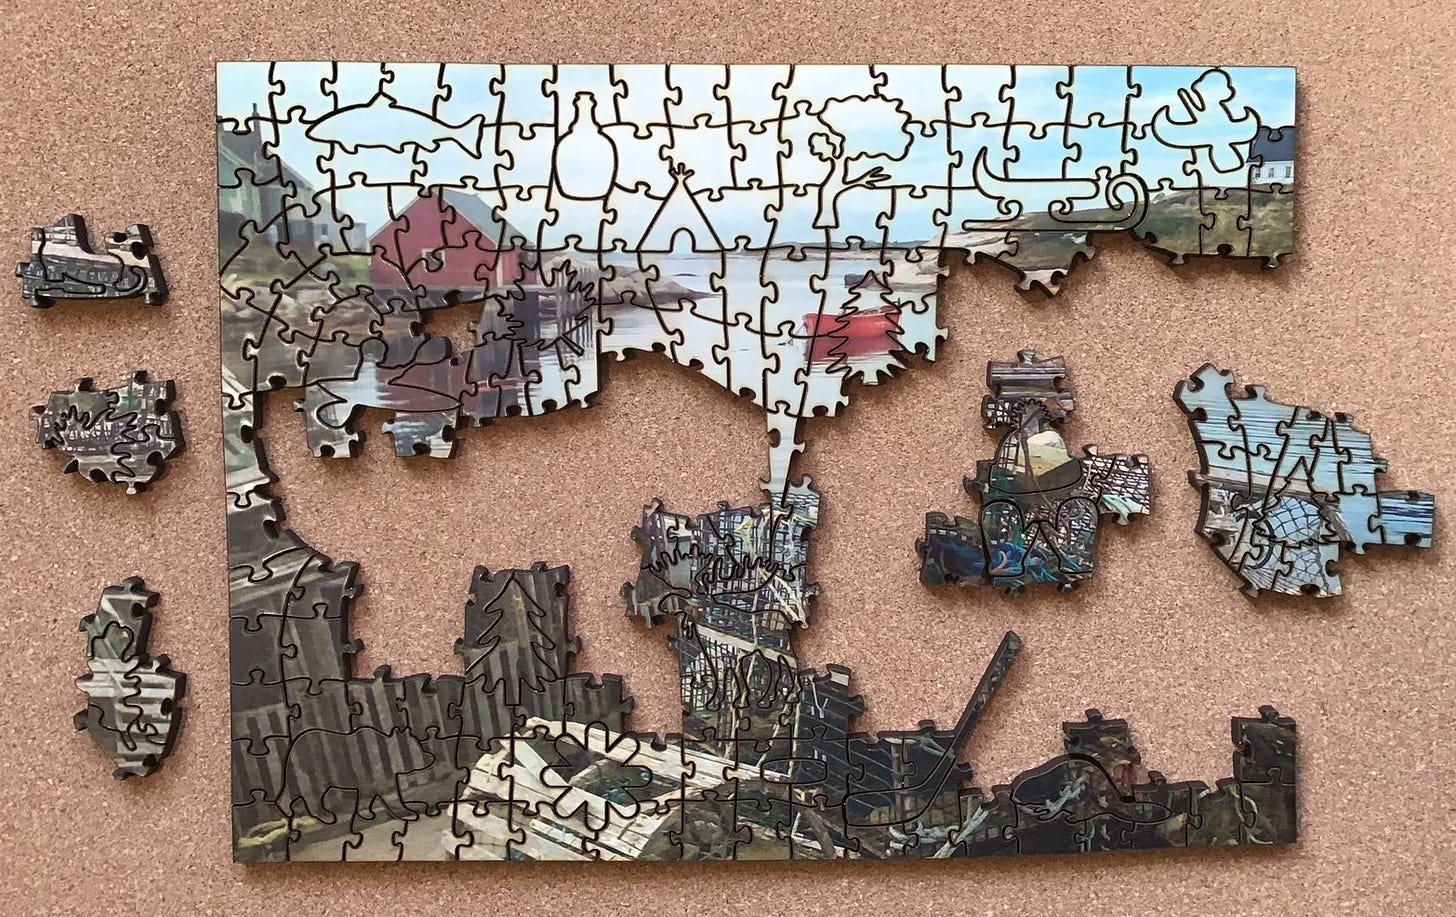
After nearly having had to abandon Cabin in the Woods due to frustration caused by an unexpectedly creative cutting design, seeing numerous attractive figurals tumble out when I poured the pieces from Lobster Traps’ jar was a welcome sight. But it wasn’t an unexpected one since I knew that having Canadian themed whimsies was the main feature of this puzzles. But that is about all that I remembered – just that it was a photo of a Canadian harbour scene (the famous Peggy’s Cove harbour in Nova Scotia) with piled up lobster traps in the foreground.
For my initial sorting I separated out the figural pieces, the potential edge pieces, and the light blue pieces that I took to be sky. The only other distinctively coloured pieces were a few reddish ones that I put near each other.
I began by assembling targets of opportunity – pieces adjacent to figurals and ones that had the red colouration.
I decided to focus on the sky. It appeared that the non-figural pieces would have the familiar and efficient-to-cut grid cutting.
I worked down from there, and began doing the bottom edge. The background grid was beginning to look a little wonky:
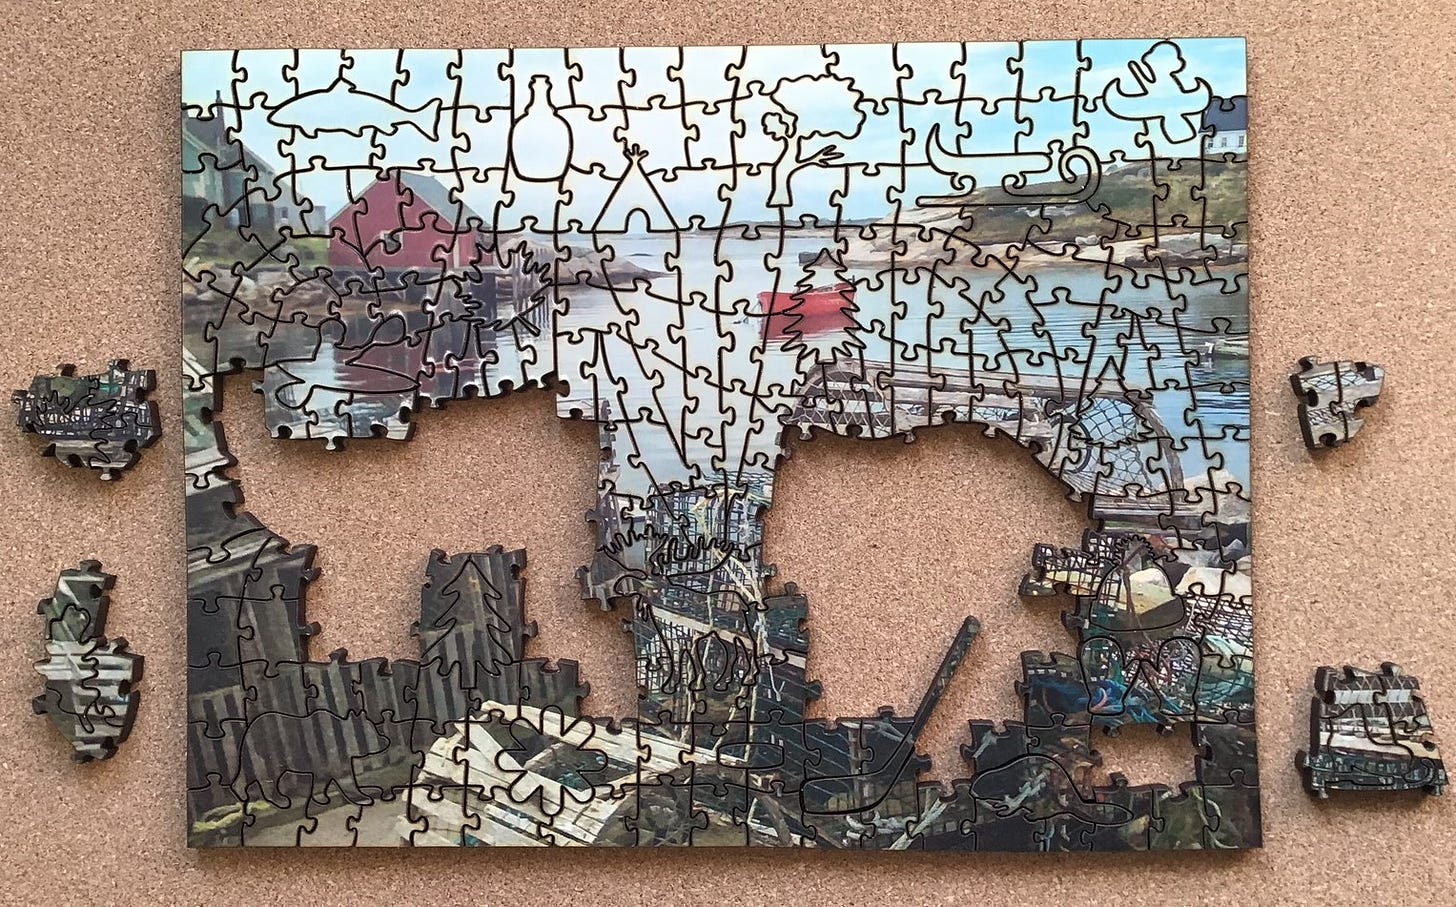
After the very challenging Cabin in the Woods this figural-rich design had me back in my comfort zone and assembly was going fairly smoothly. The lobster traps in the foreground gave me some visual clues, but not as much as they would have if the image had been sharper and not so dark and smudgy. Other than that progress continued pretty much as I would expect from a whimsy-rich jigsaw puzzle in which islands of sub-assembly can be made around the distinctive outlines of the figural pieces.
I think it was about here that I recognized that the grid-like background was getting wonky because it was interrupted by a large word that was also made of fully-interlocking pieces. It did not take me very long to guess what the word would be. Actually, the wonkiness of the background word makes assembly somewhat more challenging than a regular grid-cut, and I have not seen this done in a puzzle before. It is a very welcome improvement over a simple interlocking grid background.
The rest of the assembly proceeded pretty much as you would expect from a whimsy-filled puzzle – colour matching and shape matching.






















I enjoyed learning about how you became aware of Rocky Mountain Creators and also about why their puzzles have a “heritage” feel despite relatively low price. It is also interesting that this company produces other kinds of craft items beside jigsaw puzzles. Beautiful cutting boards, evidently one of this company’s additional products, are items I’ve often looked for over the years when I’ve needed to come up with a wedding gift for a friend or relative.
You’ve made clear that the puzzles under discussion today are worthy “frugal alternatives.” I liked your explanation of how you felt the technical shortcomings re: the first two RMC puzzles you bought were outweighed by your high rating of their “very creative, attractive and challenging cutting designs.” It must surely have been gratifying for you that some past problems seem to have been resolved, and that the company sent you a free prototype puzzle ("Shop Local") reflecting progress being made. I actually like the image used for "Shop Local" best among the images of the puzzles you’ve reviewed today.
You did a fine job describing the whimsy pieces (and especially the clever spelling-out of CANADA) as you discussed assembly of today’s three puzzles. Well done, Bill.
Thanks,
Greg